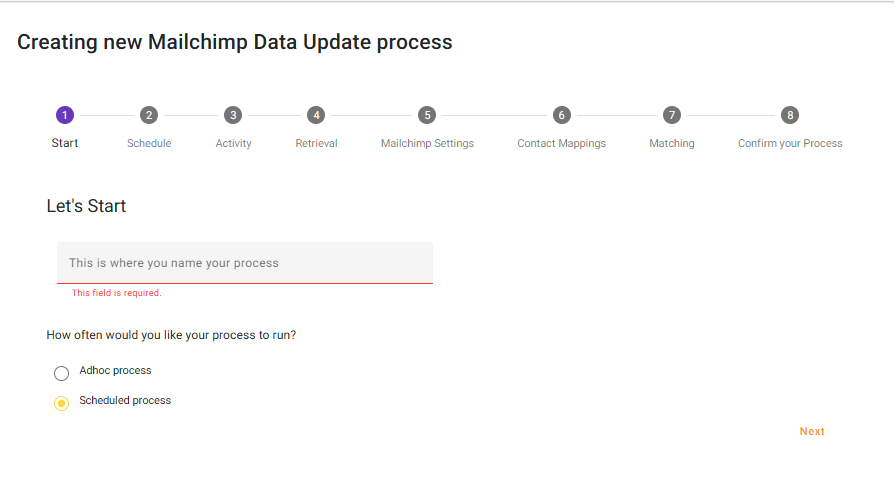
Give your process a name (we recommend a strong naming convention) and choose ‘Scheduled process’
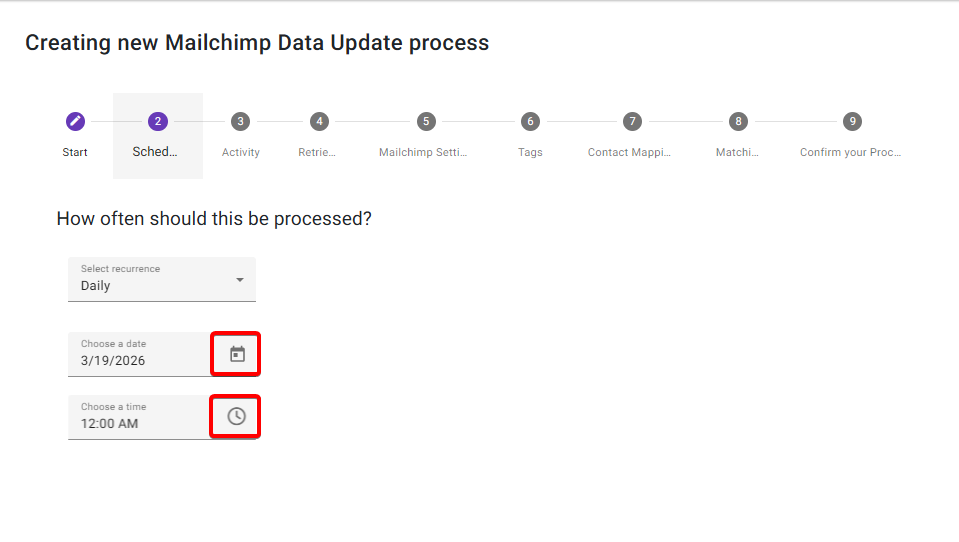
Schedule
Select how often the process should run. Click on the Calendar icon to set the date and click on the Clock icon to set the time
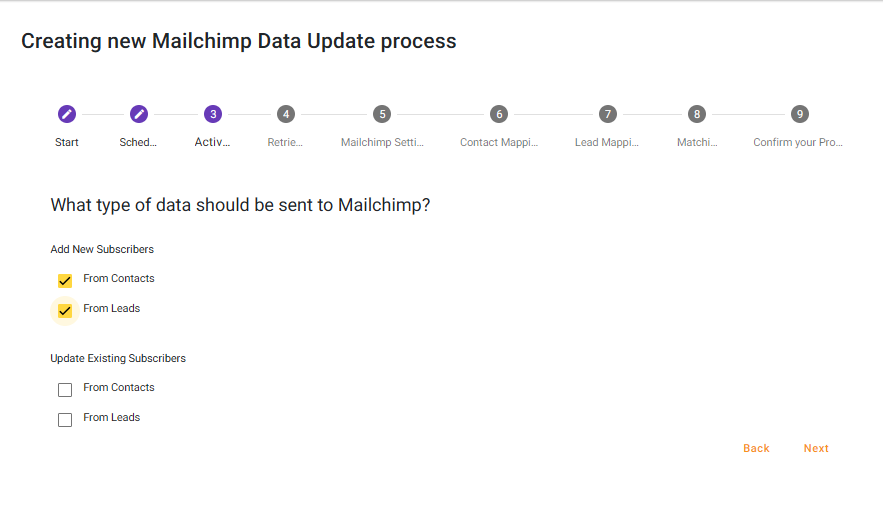
Activity
Select what type of data/records from Salesforce should be sent to Mailchimp. Selecting a Lead option will offer up an extra mapping step
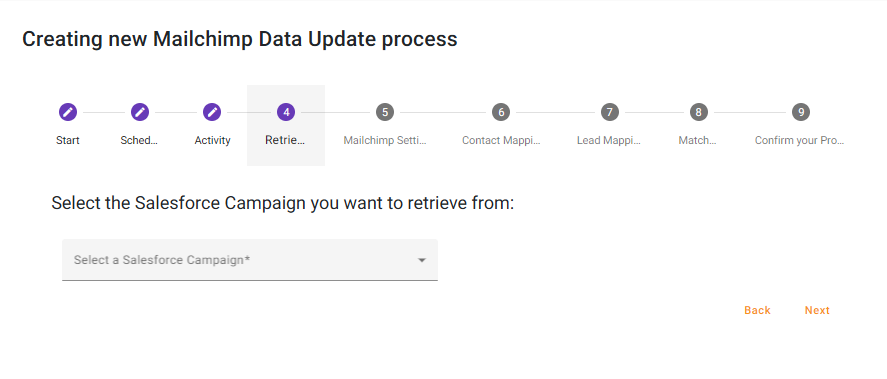
Retrieval
Select a Salesforce Campaign to pull from. This will include both ‘List’ and ‘Activity’ Chimpegration Campaign from Salesforce.
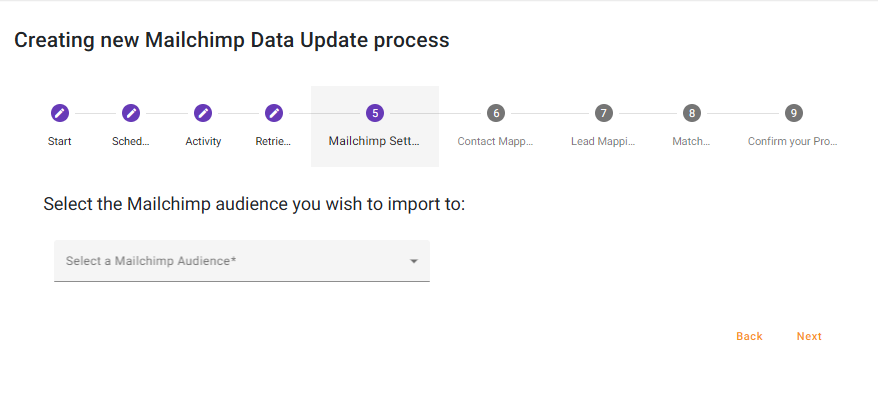
Mailchimp Settings
You can choose which Audience Chimpegration should use to update
Tags
If you wish to apply a Tag(s) to the records in Mailchimp, you can chose an existing Tag(s) or you can create a new Tag(s). If you wish to create a new Tag, type in the Tag name and then click on the purple circle with the whitw plus sign.
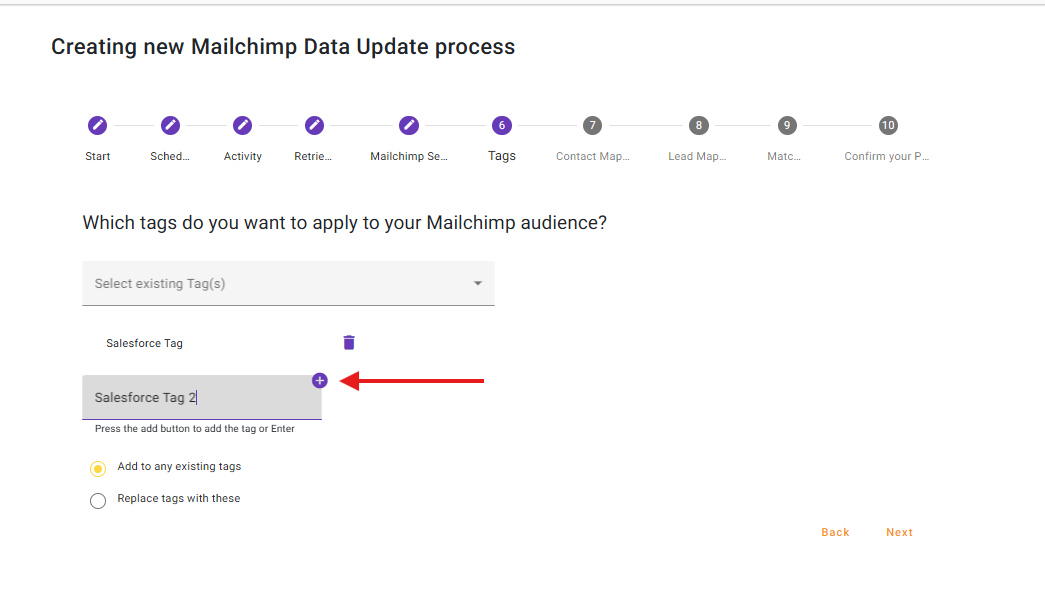
Once you have selected your Tag(s), you can chose between adding the Tags to existing Tags or replace existing Tags with the incoming Tags.
Contact/Lead Mapping
Here you can map your Salesforce fields to your Mailchimp merge fields. If you have updated to Add/Update Contacts as well as Leads, the Leads Mapping will pre-populate using the same fields you mapped in the Contact Mapping Screen.
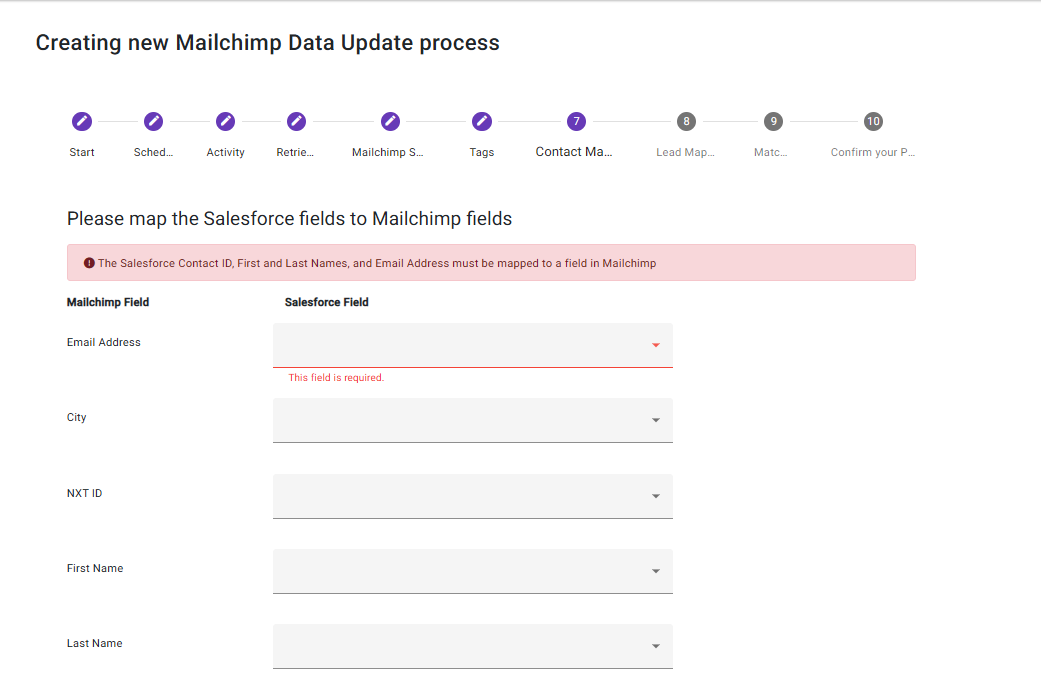
If you do not wish to import certain Mailchimp fields simply ignore them in your mapping.
The Contact/Lead ID field must be matched to the appropriate Mailchimp field, this field is mandatory. There should be a single Mailchimp Merge Field to capture the Salesforce Contact/Lead ID. Do not have a merge field for the Contact ID and a second merge field for a Lead ID
You can set up any number of merge fields in Mailchimp before your import to accommodate your Salesforce data. You must include an email address or the export will not run, as this is a field required by Mailchimp.
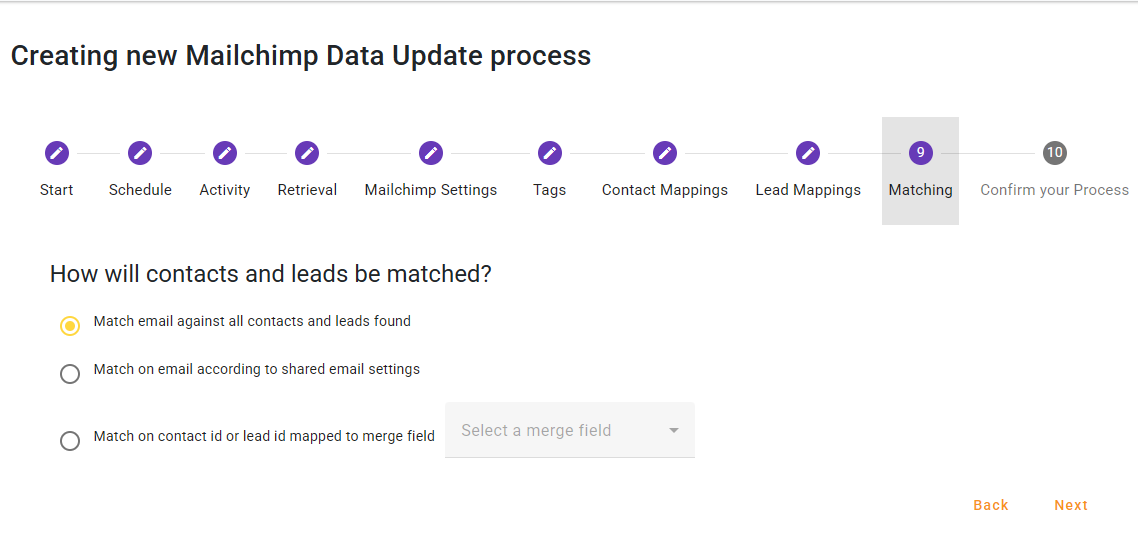
Matching
Choose how Chimpegration should find a suitable match within Mailchimp. See here for more information about ‘shared email settings’.
Confirm Your Process
Review what you have selected and then click ‘Save’ to start the process.