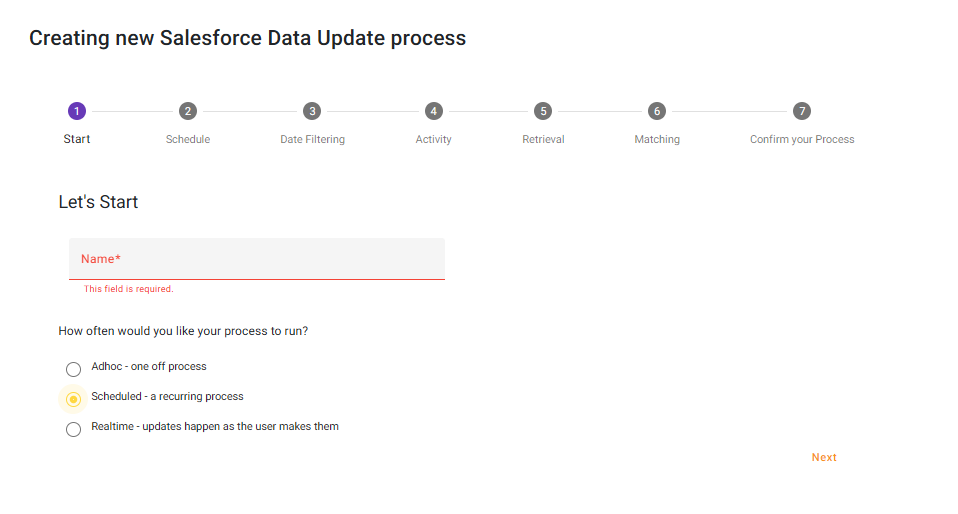
Give your process a name (we recommend a strong naming convention) and choose ‘Scheduled – a recurring process’
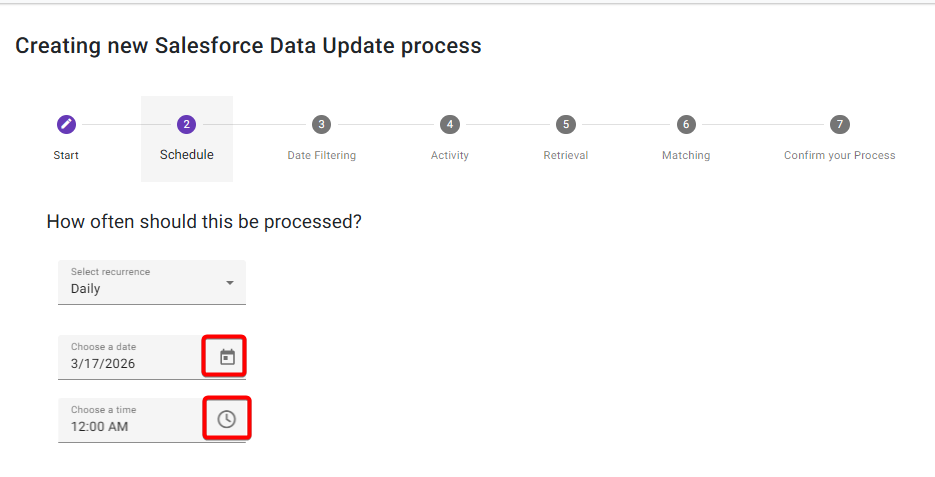
Schedule
Set how often the process should run. Use the Calendar icon to help select a date and the clock icon to set the time
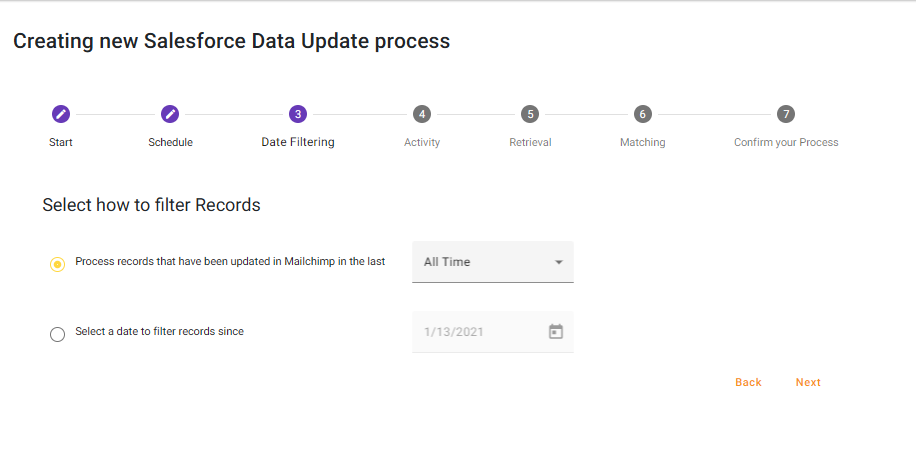
Date Filtering
Select what records from Mailchimp you want to update Salesforce with, by selecting an appropriate date range for Chimpegration to filter by
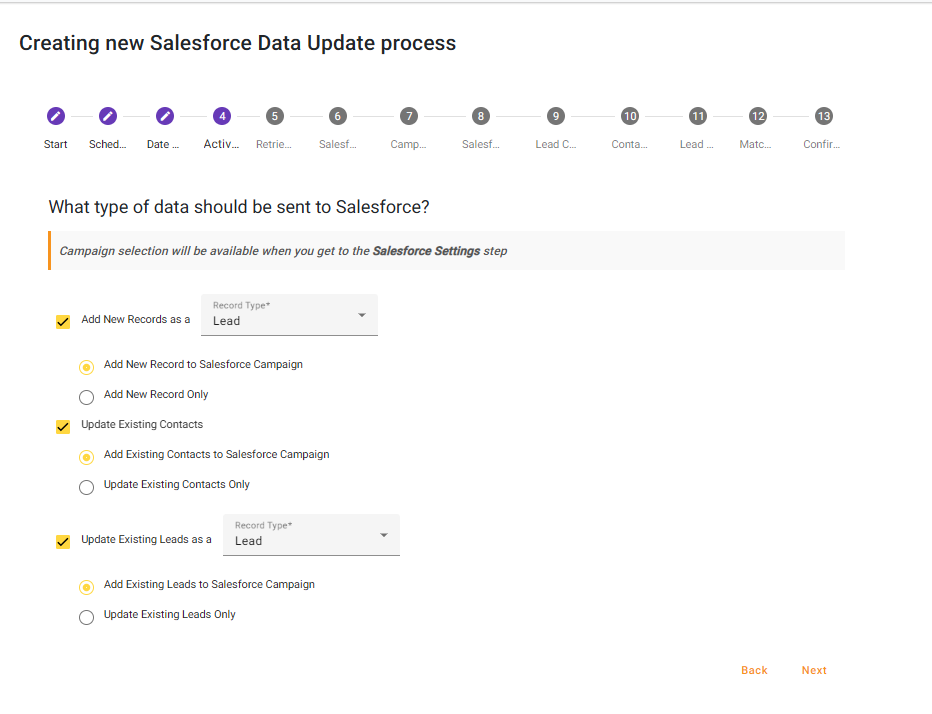
Activity
Select how Chimpegration should add/update Leads and/or Contacts to Salesforce from Mailchimp
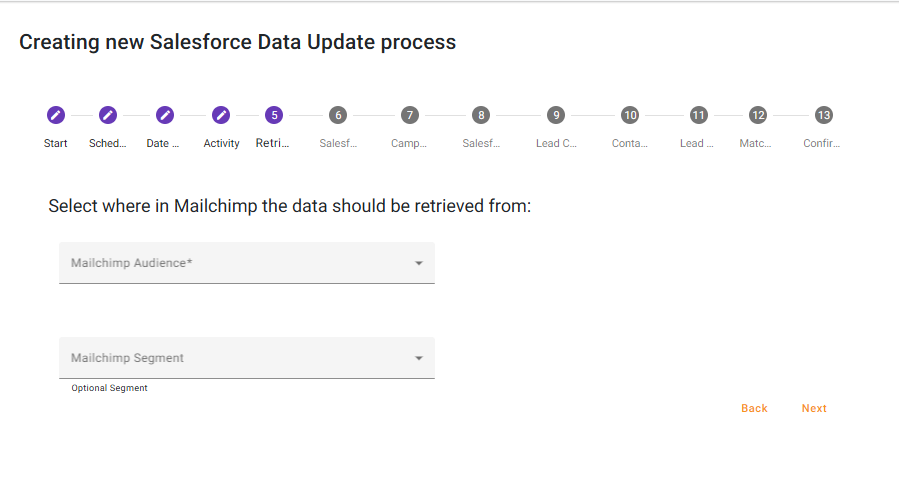
Retrieval
Select the Mailchimp Audience you want Chimpegration to retrieve data from. You can also narrow down which records to use by opting to select a Mailchimp segment present within that Audience.
Selecting more options will open more steps for your to update.
Salesforce Settings
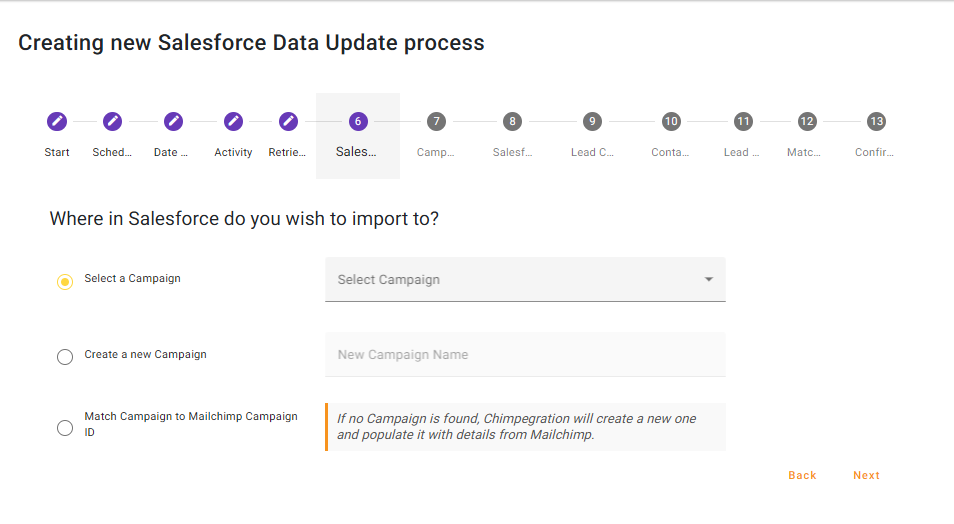
If you have chosen to Add or Update Contacts/Leads to a Salesforce Campaign, you will be given the option to select an existing Salesforce Campaign, create a new Salesforce Campaign, or Match Campaign to a Mailchimp Campaign ID.
For Scheduled Processes, the option of ‘Match Campaign to Mailchimp Campaign ID’ may be the most useful as it will create a new ‘Activity’ Campaign in Salesforce for every Mailchimp Campaign sent out since the process last ran and populate it with every Contact and/or Lead that was sent the email.
For example, if your schedule is due to run weekly, and you sent out five Mailchimp Campaigns in that week, Chimpegration will create 5 Activity Campaigns in Salesforce, using the details of the Mailchimp Campaign for its Name and start time. Then it will populate each Activity Campaign with the relevant Contacts and/or Leads.
Note: the option ‘Match Campaign to Mailchimp Campaign ID’ will look in Salesforce for an Activity Campaign with the same Campaign ID. If it does not find one, it will also look for an exact match on the Campaign Name. If it still can not find a match, a new Activity Campaign in Salesforce will be created.
Campaign Details (if applicable)
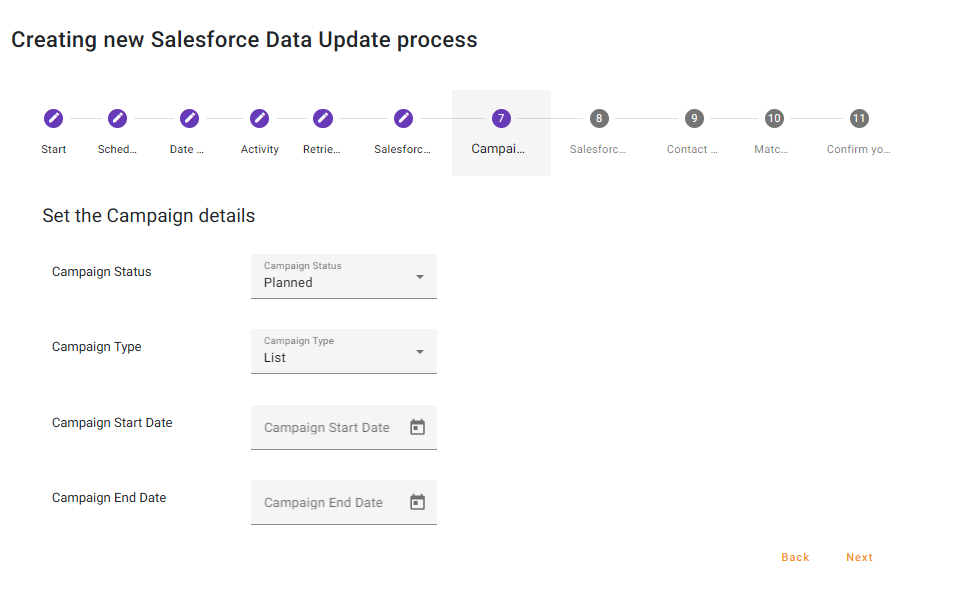
If ‘Select a Campaign’ or ‘Create a New Campaign’ was selected on the previous step, you will now need to consider the Campaign details as they will appear in Salesforce . Here you will also need to determine what the Campaign Type will be: List or Activity.
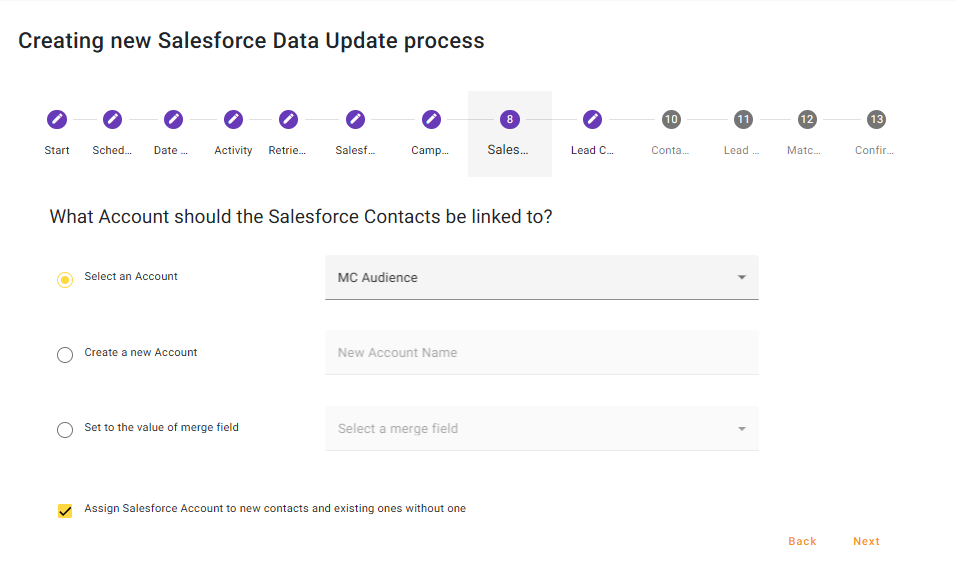
Salesforce Account
If you have chosen to Add or Update Contacts, tell Chimpegration which Account should be applied to Salesforce Contacts. You can use an Existing Account, create a new Account or Set to the Value of a Merge Field. By default, the option to assign a Salesforce Account to new contacts and existing ones without an Account is checked.
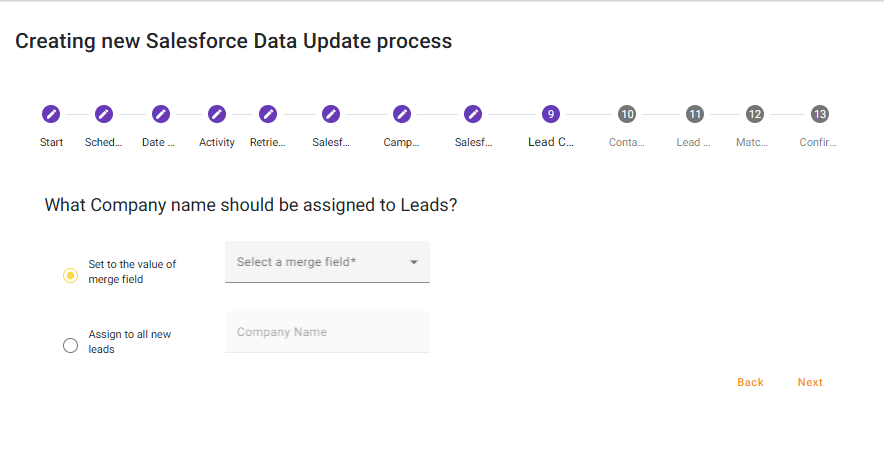
Lead Company Name
If you have chosen to Add or Update Leads, tell Chimpegration which Company should be applied to Salesforce Leads. You can use a value that was captured in a Merge Field in Mailchimp or create a new company that will be applied to all new Leads.
Field Mapping – Contacts and Leads
Here you can map your Mailchimp merge fields to the appropriate place in Salesforce. If you are adding/updating Contacts and Leads, map the Contacts Mapping and Chimpegration will pre-populate the Leads Mapping with the same field to save you time.
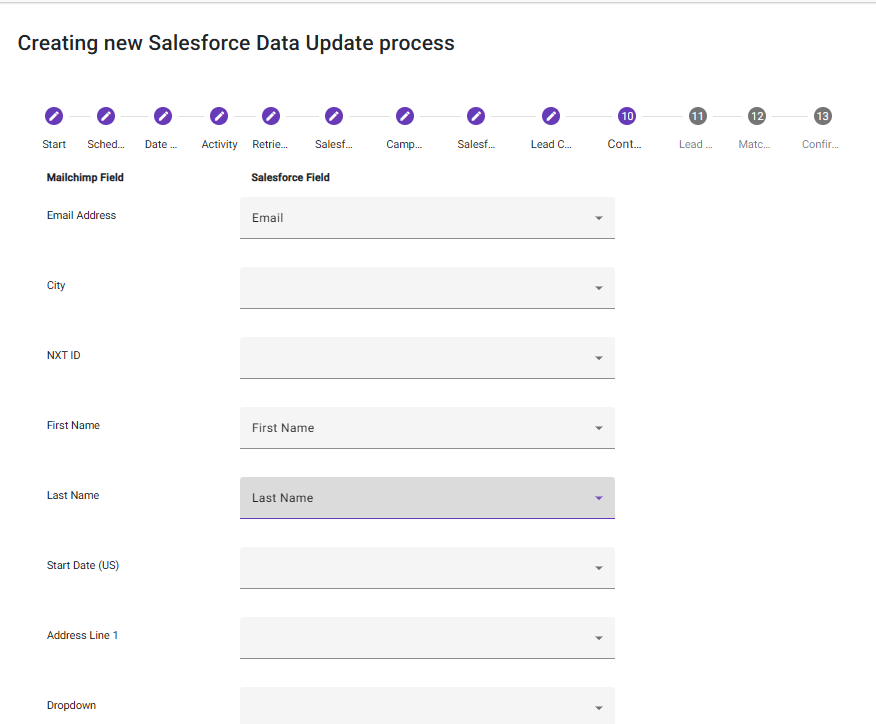
If you do not wish to import certain Mailchimp fields simply ignore them in your mapping.
Matching
Choose how records should be matched:
- Match email against all contacts and leads found
- Match on email according to shared email settings. See here for more information about ‘shared email settings’.
- Match on contact ID or lead ID mapped to the merge field; select the Mailchimp field from the drop-down containing your Salesforce ID

Confirm Your Process
Review your process and click ‘save’ to start