Templates and Data Sources
A template is just a set of instructions on where to put data from your data source into RE. It also is a set of instructions on how to handle the incoming data to ensure that it goes into RE cleaned and in a state that RE will accept.
With each data source you will need to create your template based on the data you wish to import. Some Data Sources segment their data further into Activities or Processes each with their own range of fields and data. As a result, you may need a different template per Activity/Process.
If you data source is a file (a CSV or Excel), you may need to create a different template per file or worksheet if the column headers differ. The order of the column header do not matter, but the names of the column header does. If you plan on using the same template with different files, you need to make sure that the column headers that are mapped in the template match those of the originating data used to build the template.
Getting Started
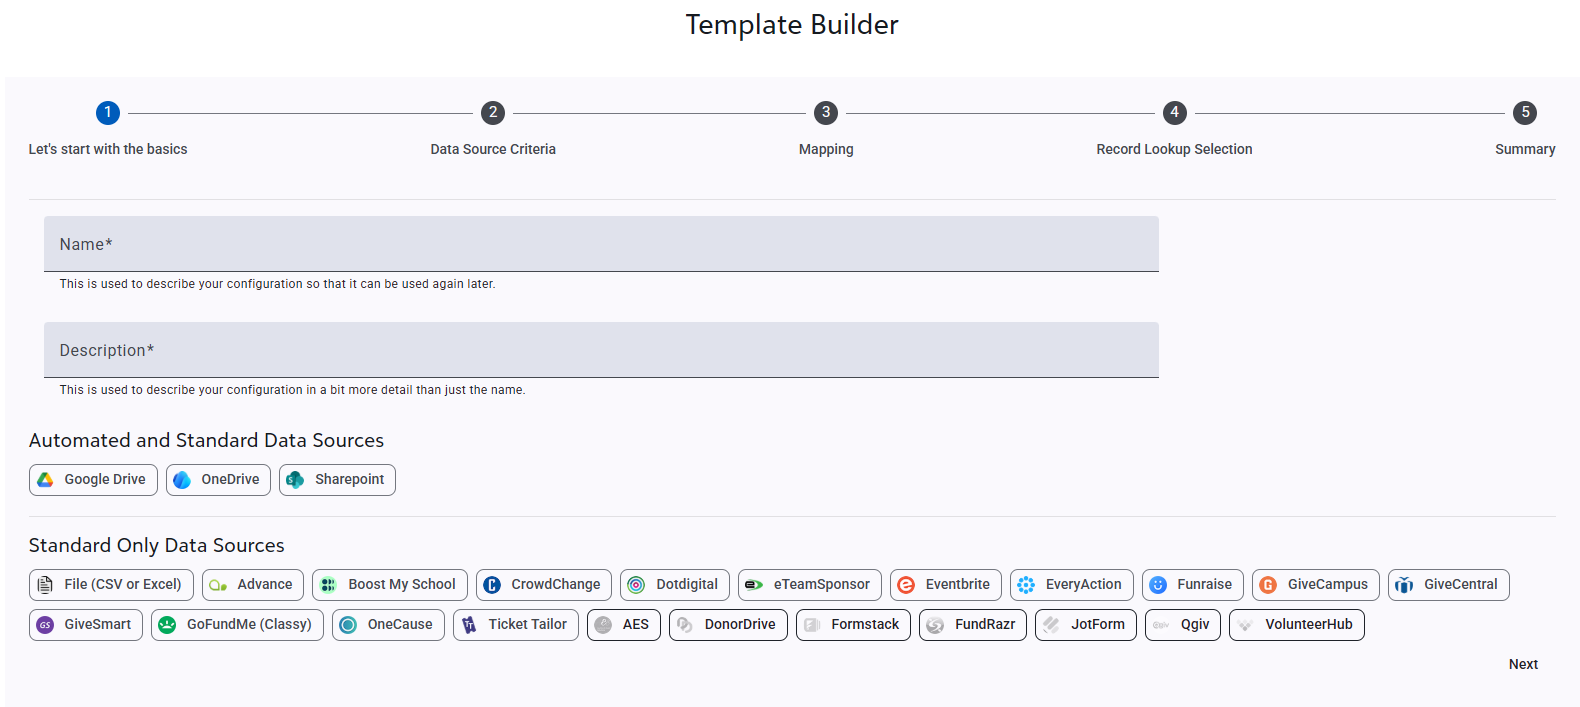
On opening up Template/Template Builder, you are asked give the template a Name and a Description. As you may soon have a number of templates, we recommend a strong Naming Convention that makes it easy to understand what the template is for.
For the Template Description, please make it clear what the template does for future users to understand that template’s purpose.
Then choose what data source the template is for and click on ‘Next’. All data sources will allow you to set up Standard Imports (that run immediately upon completion of the Import Creator) and, at present, only a small number will also allow you to set-up an Automated Import (that runs when you have told it to). Please consider your data source when setting up your template.
Please note: file-based Data Source Templates can be cloned and converted to be used with other file-based data sources in the Template Manager if needs be.
Configure your Data Source
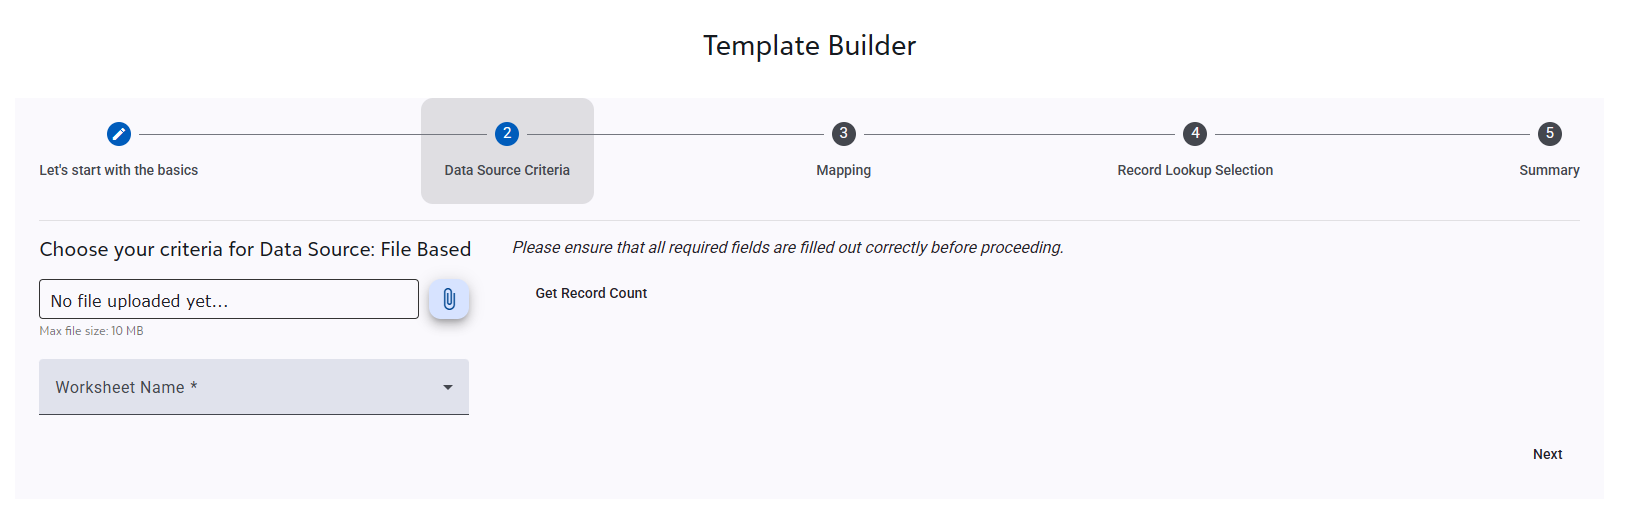
Depending on what Data Source you chose on the first step, the second step will present you with an option to attach your Data Source. If it is a File-based data source, then click on the paperclip where you can then search and select the file you want to use. If it is not a file-based data source, fill in the Data Sources Criteria to pull across some records.
Whatever the data source, you will need a least one record to continue with the rest of the template building. To make sure you have enough records to work with, click on the ‘Get Record Count’ button to see how many records are available.
When building your template, we strongly recommend that you work with just a handful of records, that are reflective of your data source. These ‘sample’ records should not point to real donors in your RE, but are test records that can be written to without issue.
When ready, click ‘Next’
Mapping
Canvas, Data Destinations and Area Mappings
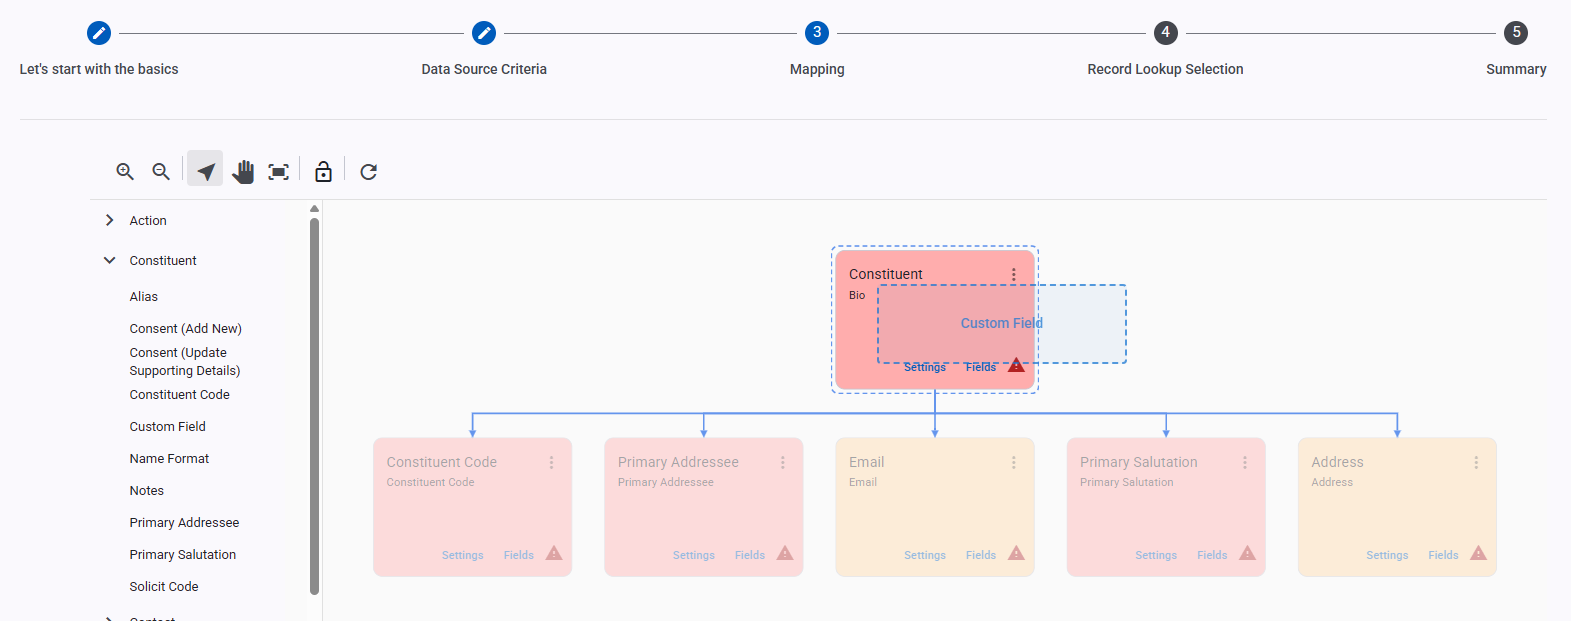
Step 3 is where you actually builder your template, map your areas, map your fields and apply a number of settings. It uses a drag and drop feature to builder the structure of your template as well as map specific data source fields to fields within RE.
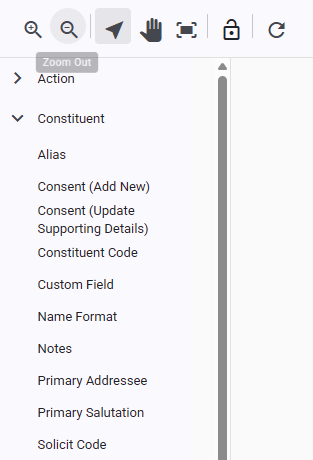
On the left-hand side of the screen are a list of Area Mappings that you can map to. They are segmented into their own Data Destination. Clicking on the chevron will open up the Area Mappings for that Data Destination
The main section of the screen is the ‘Canvas’. We have pre-populated the Canvas with several commonly used Area Mappings to help you get started. Selecting the three stacked dots on each Area allows you to Edit Name, Clone, or Delete. We recommend that if you choose to edit the name, you maintain a strong naming convention. This will make it easier to find the Area Mapping highlighted should an exception occur.
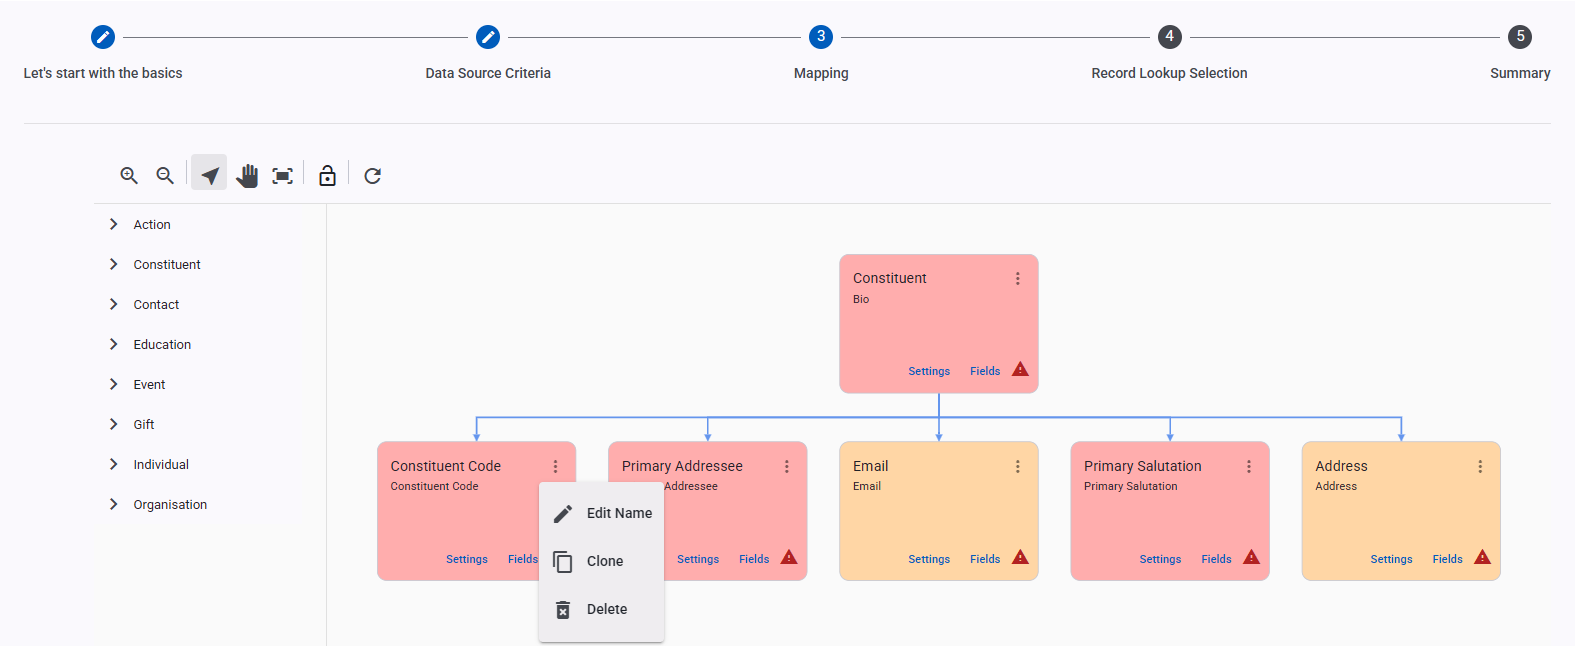
To add new Area Mappings to the Canvas, simply select the Area Mapping in question and pull it across onto the Canvas and on top of an existing, relevant Area Mapping. This will attach the new Area Mapping to the existing Mapping. The Canvas will highlight which existing Areas you can attach the new Area to.
Once attached, you can then reposition the Area Mapping to where ever you like on the Canvas. We recommend that you consider how other users might understand the template’s structure.
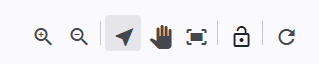
On the top of the Area Mapping section of the screen, there are some additional buttons to allow you to adjust the Canvas. You can zoom in and out or set it to ‘fit to page’. Additionally, you can change the pointer for selecting items onscreen to a grab-hand that allows you to reposition the whole template on the Canvas.
You can lock down the position of your Area Mappings, by selecting all the Areas you want and clicking on the padlock icon. Selecting and clicking on the padlock icon again, unlocks the Area. Locking down the Areas still allows you to edit, update and delete the Areas.
The circular arrow allows you to refresh the code tables used.
Field Mapping
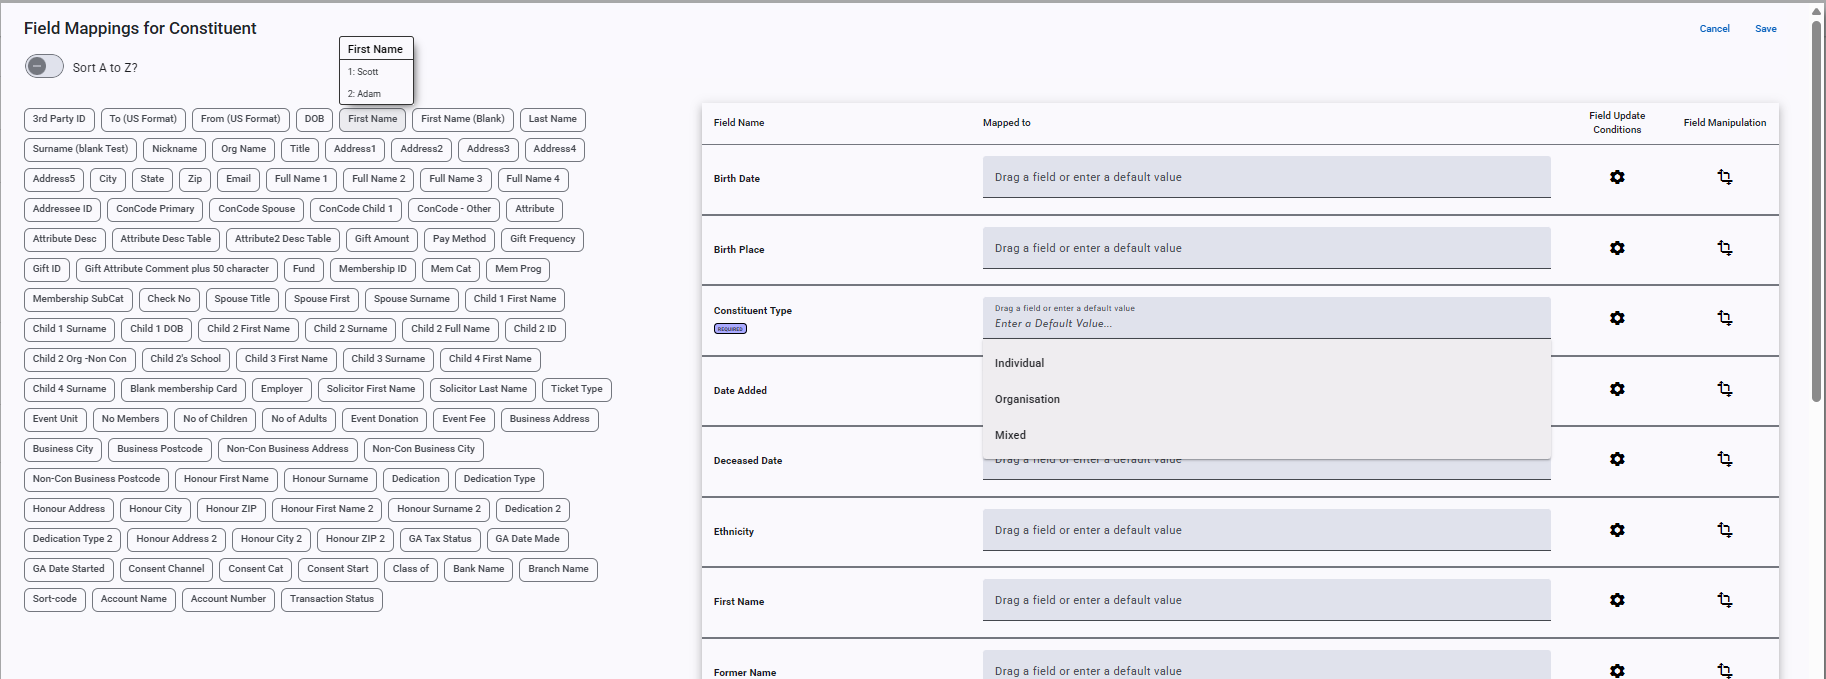
When you are ready, you can start mapping your fields. To do so, simply click on ‘Fields’. This will take you to a new window that features the fields from the data source on the left and the fields to map to in RE on the right.
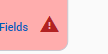
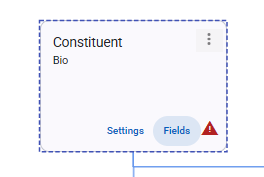
Note: that when ‘required’ field have not been mapped, the Area Mapping shows a red triangle warning you of that.
You can either drag and drop a data source field onto a relevant field in RE and put in a default value. The RE field will expand slightly to highlight that it can accept the data source field.
If you use a default value like a value from a a dropdown list or a value that was typed it, the field will show the value with a ‘Tt’ prefix:

If you use a Data Source field it will show the name of the Data Source name and the field will show an arrow prefix:

If you hover over a Data Source field, it will show you the first two rows of the actual data coming from the data source. This should help you better understand what data is going to be added to RE and whether you might need to make any adjustments so that RE will accept it.
Field Update Conditions
Once you have mapped your field, you can click on the cog icon to open the Update Conditions for that field. Here you can choose to have the field be added when creating a new record or update/overwrite an existing record. By default, First Name, Last Name/Surname, Org Name and Title are set to only add to New Records. Whereas Lookup ID is set up to not add to New records or update existing records. All other fields have New Records and Existing Records pre-selected.
You can also set up a Conditional Update Value to add/not add the field based on the condition of another field.
When a default setting has been changes, the Cog icon will change to green.

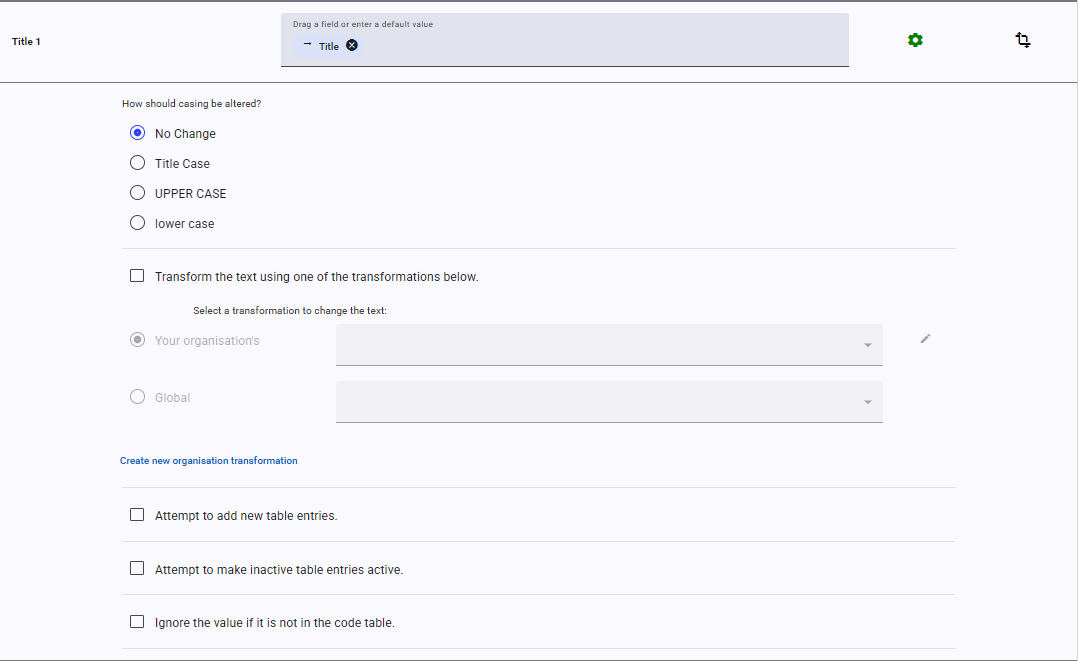
Field Manipulations
Here you can change the nature of the incoming value from the data source.
You can clean up the text values by having Importacular make the text, all Upper Case, Lower Case, or have Proper Casing (first letter of each word is Uppercase and the rest are lowercase)
You can apply a Data Transformation where you can change the incoming value to another value.
Depending on the RE field, Importacular also offer other field manipulations specific to that field. For example, if the RE field has a Code Table attached, Importacular will offer you some additional settings on how to handle these Code Tables.
Area Settings
Heading back to the Canvas and the Area Mappings, each have a ‘Settings’ button. Clicking on this opens up a new window with a range of options on how Importacular show handle importing that whole area. Most Area Setting are pre-set to ensure that existing areas in RE are not overwritten, but we highly encourage you to look at and consider the options available.
Unlike Field Update Conditions and Manipulations, Area Settings are a lot more tailored to each specific Area Mapping and as such vary from area to area. However, most contain a feature to select options to match on and give instructions on what to do when a matched Area is found. There are also Area-level Conditional Update settings that allows you add/not add the area based on the status/value of a field from the data source.
When ready, click on ‘Next’ at the bottom, right-hand side of the screen, underneath the Canvas.
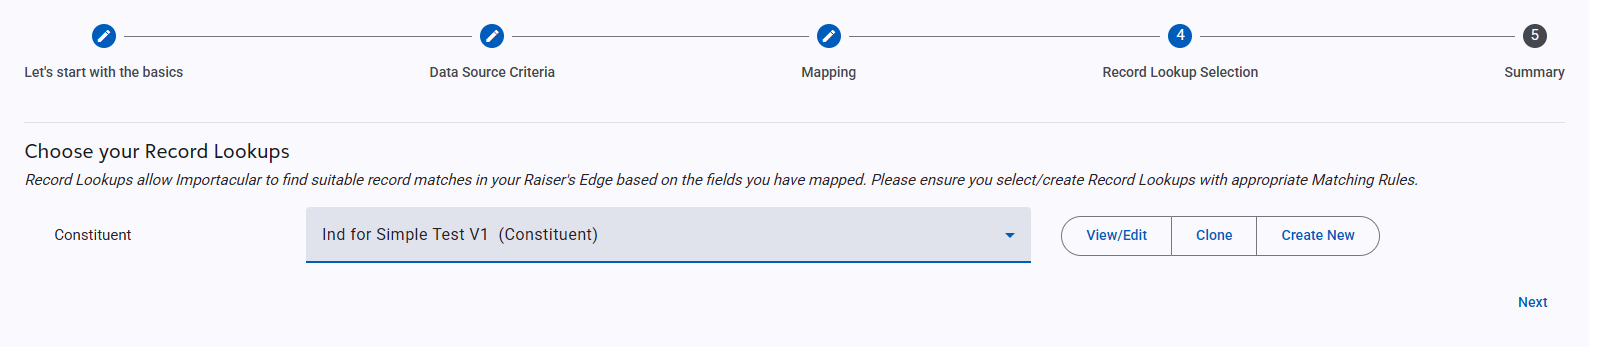
Record Lookup Selection
Now select the Record Lookup you want to use. Your Record Lookup should reflect the data you have mapped. For example, if you have a Matching Rule in your selected Record Lookup set to match on email address, but your template does not contain a mapped email address, that Matching Rule will be ignored. If you do not have a suitable Record Lookup, you can Create a new one; select an existing Record Lookup (if any) and ‘Clone’ it (creating a new, prepopulated Record Lookup that you can adjust), or select an existing Record Lookup and ‘view/edit’ it.
If your Record Lookup is being used by other Templates and you wish to make an adjustment to a Matching Rule, consider how it might impact those other Templates. If you are unsure or think the adjustment may negatively impact the other Templates, return to the Template Builder and select ‘Clone’. This will create a duplicate of the Record Lookup where you can rename and make adjustments without impacting other templates.
When done, click on ‘Next’
Summary
When you get to the final set, you can chose to create an Import or head elsewhere.
If you chose to ‘Create your Import’, you will be taken to the Import Creator, where it will be pre-populated with all the necessary details. Consider adjusting the name of the Import and selecting a new data to work with
