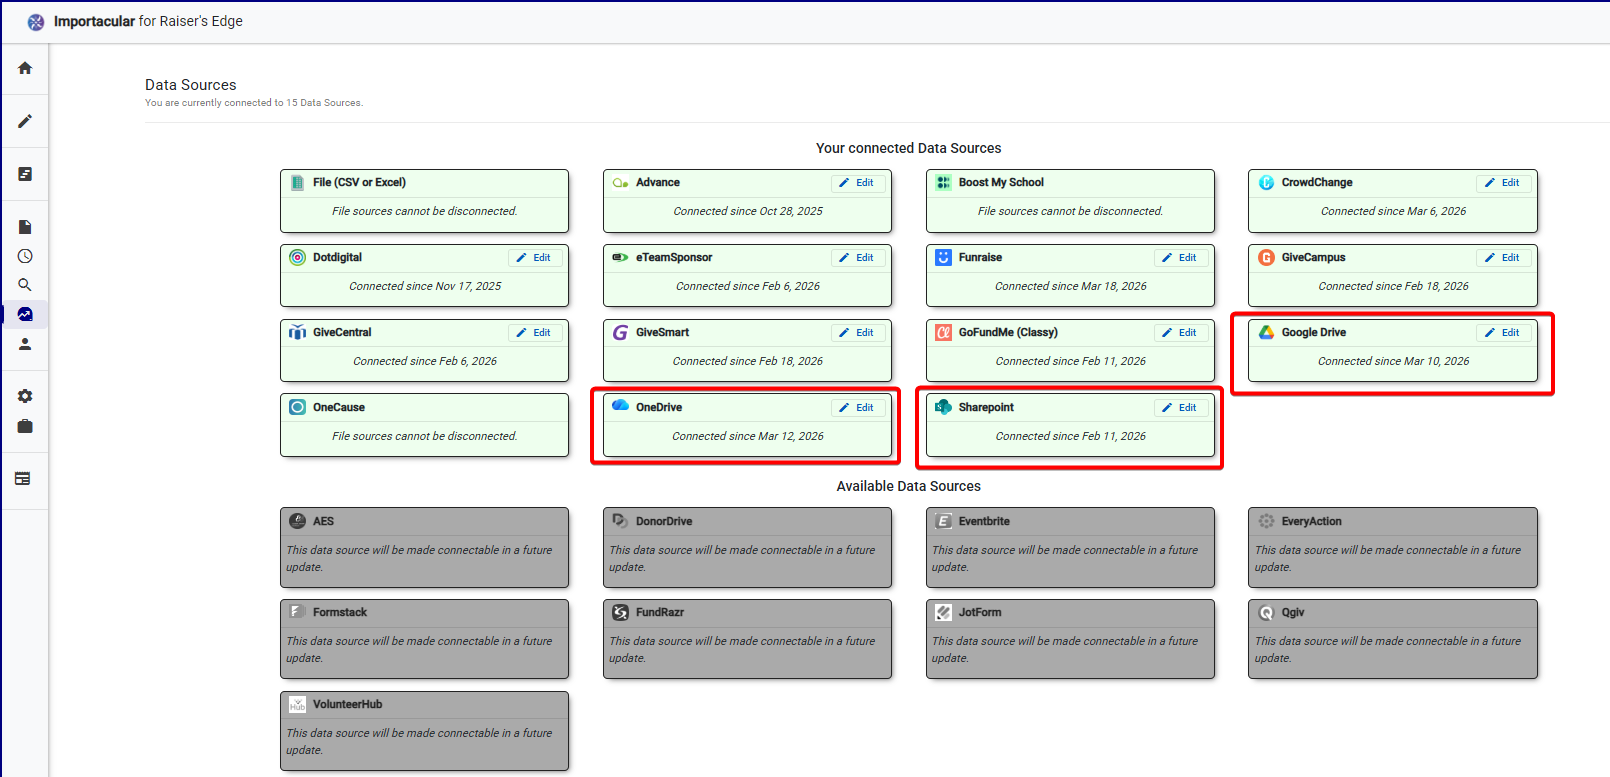
To automate your imports, you will need to use one of the file-based cloud storage Data Sources: Google Drive, One-Drive, and Sharepoint , and ensure that the files you seek to import automatically are either .csv, .xls or .xlsx files. How you choose to automatically add new files to these data sources is up to you. What Importacular NXT is offering is the ability to look in to a specific location within these data sources, at a specific recurring date and time, and pick up any files that meet the criteria that you stipulate and import the records from that file.
Automations via other data source will be added over time, but for now we are offering a file-based solution.
Sign in to your Data Source
Firstly, make sure that you have signed in to the data source via the Data Source Manager. For One-Drive and Sharepoint, you will be asked for your Microsoft credentials. For Google Drive, you will be asked for your Google Credentials.
Build your template
Like with any other data source, you will need to build a template based on the file you seek to import, using the Data Source you want to use for your Automation. For more information about building your template, please look here.
NOTE: These templates are file and data source specific, so if you start off building your template using the ‘File (CSV/Excel)’ data source and then want to place the file in Sharepoint, you will need to build your template again.
Also make sure you have suitable Record Lookups in place to go with your template. Look here for more information about Record Lookups.

Build your Automation
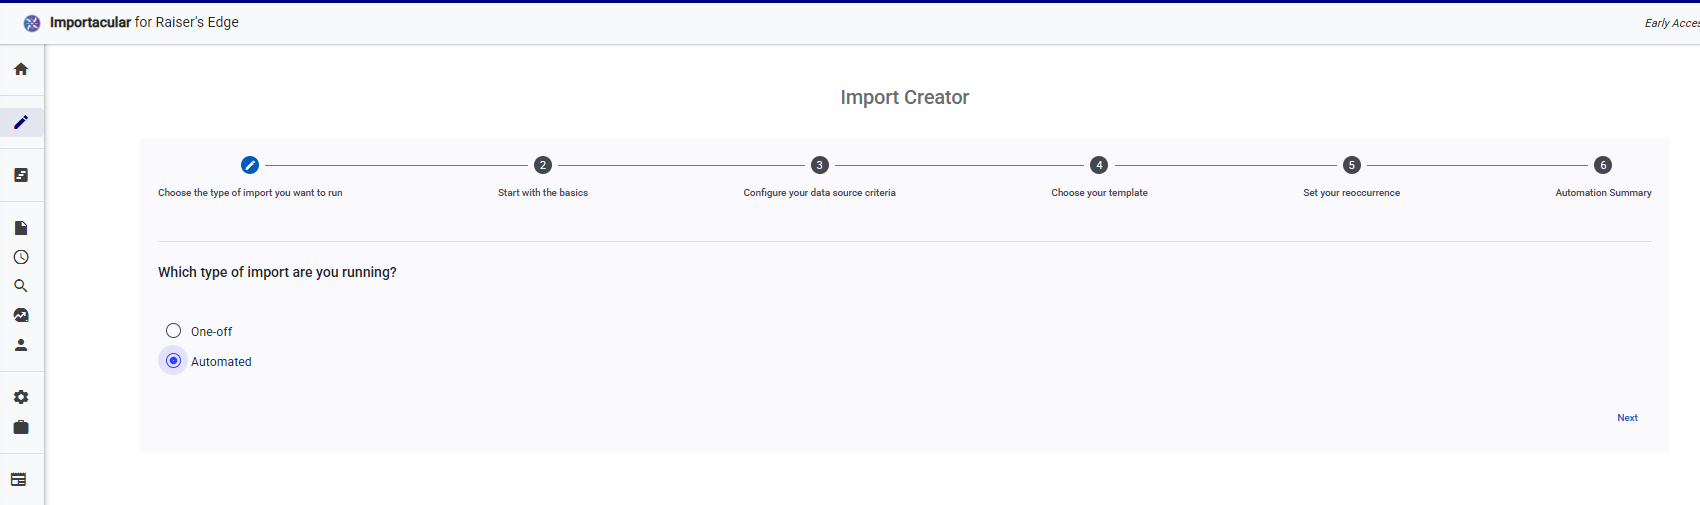
Once you have your template (and associated Record Lookups) in place for your desired Data Source, create a new Import. Within the Import Creator and select ‘Automated’ for the type of import.
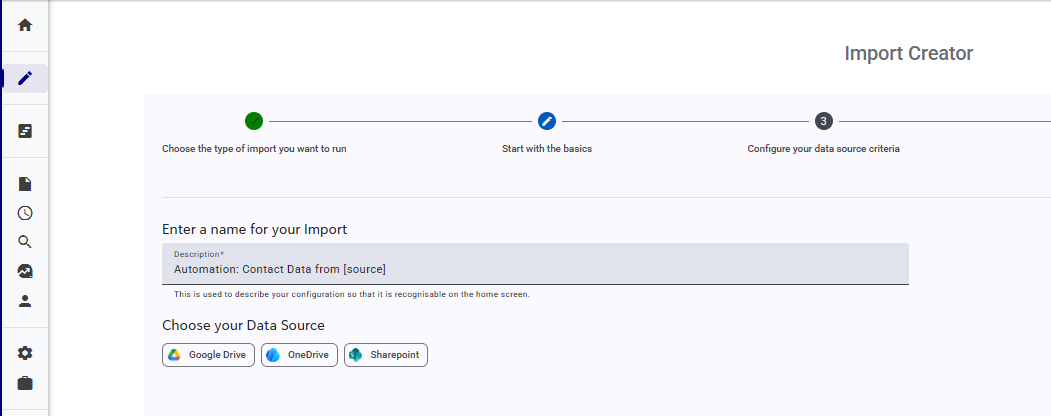
Start with the Basics
Give your Automation a sensible name and select the Data Source you are going to use.
Configure your data source criteria
Select the location of where the files will be placed. Next, tell Importacular NXT what the file name pattern is. This should include the format of the date that should appear on the files. Please use the tokens of dd, MM and yyyy in any order you like (e.g. dd.MM.yyyy, MM dd yyyy, yyyy-MM-dd, etc.), but avoid typing in actual dates.
Please also add the file extension. Importacular NXT will currently only accept .csv, .xls and .xlsx file extensions.
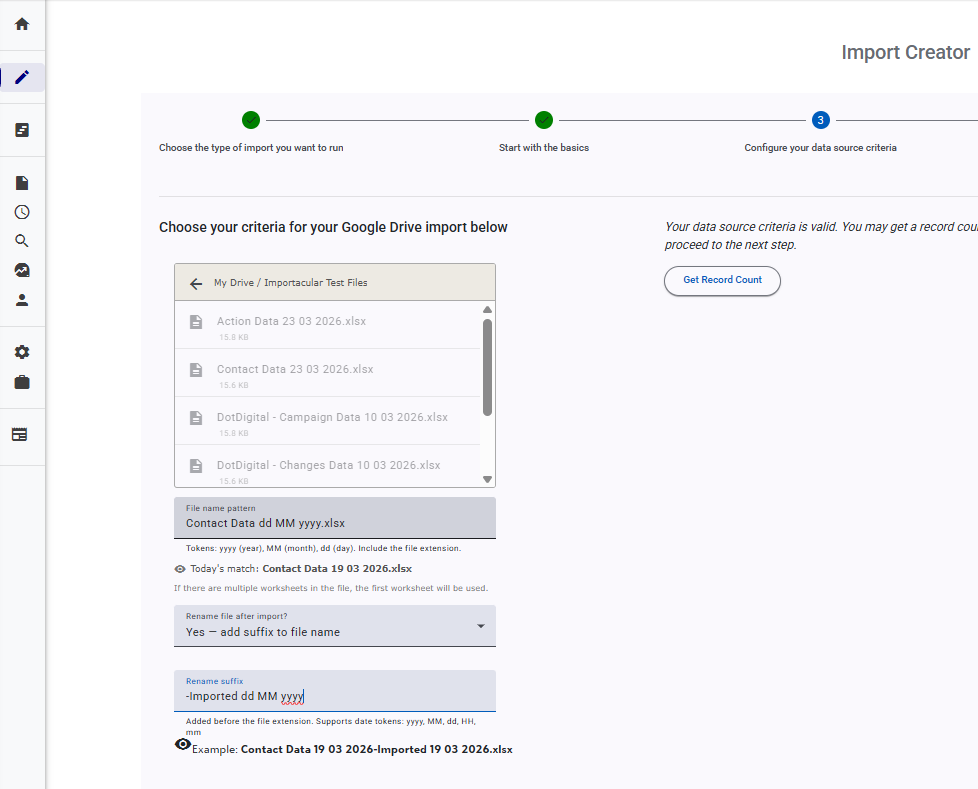
You can also apply a suffix to the file after it has been imported to ensure that the same file is not picked up again when the Automation reruns. This Rename Suffix will accept date and time tokens of dd (day), MM (month), yyyy (year), HH (24 hour), and mm (minute).
NOTE: when providing the File Name Pattern and the Rename Suffix, avoid using special characters that your data source will have issue with, such as /, \ , ?, *, :, and |.
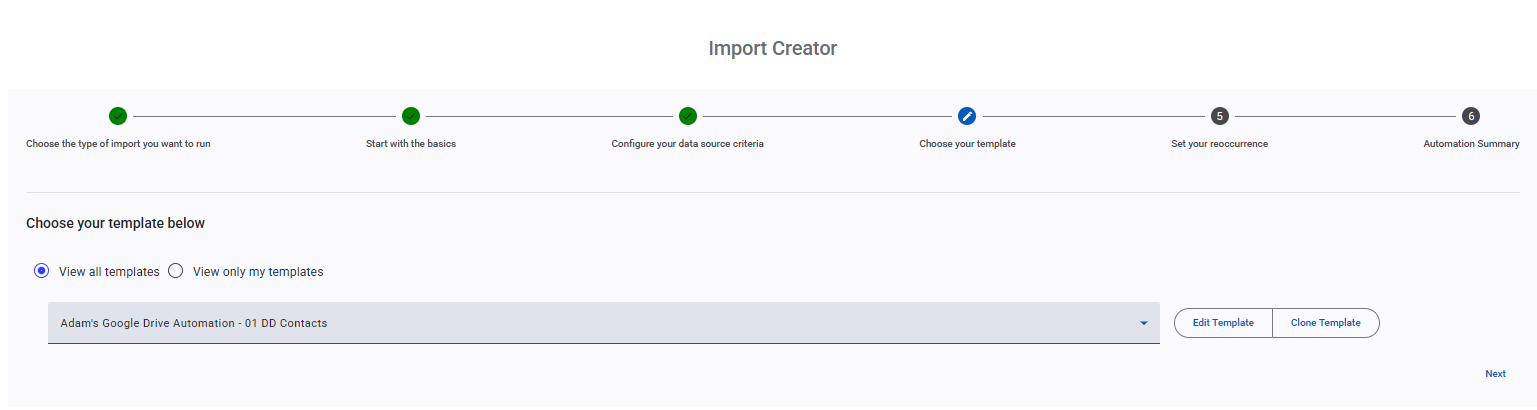
Choose your template
Now select the template you want your Automation to use. If you need to edit your template or clone your template, you can do so here.
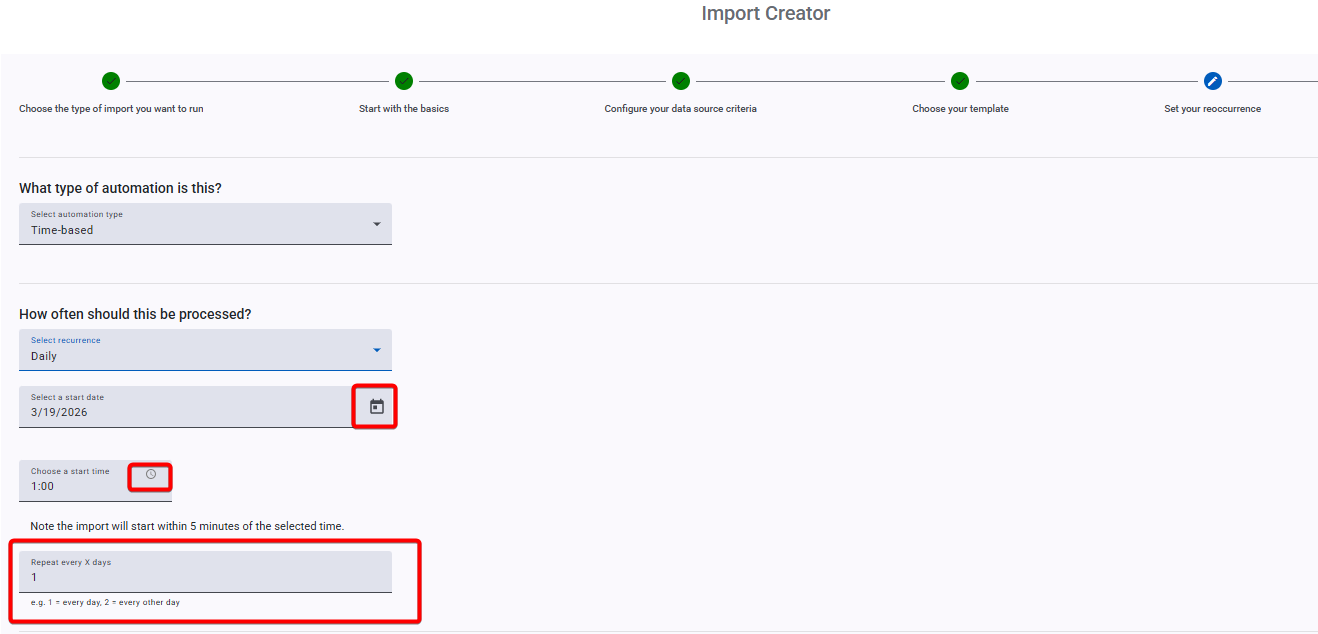
Set your reoccurrence
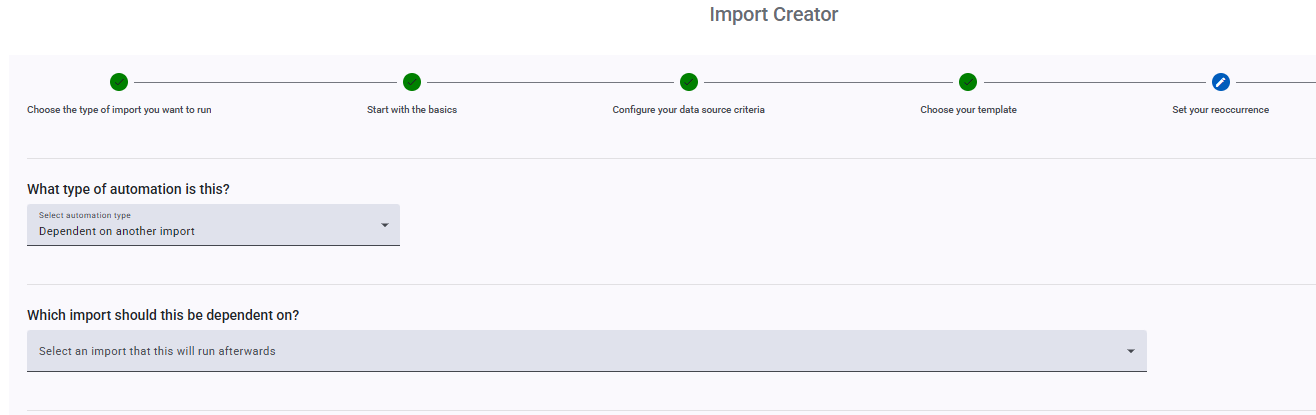
Here you will tell Importacular NXT when the Automation should run and rerun. You have two options at your disposal: Time-based and Dependant.
Time-based
If you select the Time-based option, you can choose for the Automation to run Daily, Weekly or Monthly. Next, tell it at what time it should run. Clicking on the calendar icon and the clock icon will make it easier to select your suitable date and time.
If you are running multiple Automations, we recommend that they all don’t start at the same time. Please make sure you spread them out.
For ‘Daily’ Automations, we have also given you some extra flexibility by being able to staggering your process by offering to ‘Repeat every x days’. By default, it is set to repeat every 1 day, but you can change this to any whole number. For example, setting it to 3 will result in the ‘Daily’ Automation running every 3 days.
Dependant
If you select ‘Dependant on another import’, you will be given an option to select another Automation. This means your Automation will not start until the Automation Import selected has completed its import.
For example, if you have three files that need to be imported, but you don’t want to import the second and third file until the first file has been import. In this scenario, you would create three Automation Imports. The first would be to import the first file as a Time-based Automation. The second Automation would be set up a Dependant Automation to import the second file only when the First Automation is completed. Then the third and final Automation would be set up as another Dependant Automation to import the third file, only when the second Automation is complete. Do not create multiple Automations that are dependant on the same Automation Import.
Skipping the review stage & Email notifications
You can choose to skip the review stage. If you do so, records will be added and updated as per your template and Record Lookups, but any ‘Decides’ will be ignored for you to manage after the import has completed. Ignores and Exceptions will be handled as normal.

You can also opt to have emails sent to specific Importacular NXT Users. These emails will be sent when the imported is completed, if you need to review the data or if a problem was encountered.
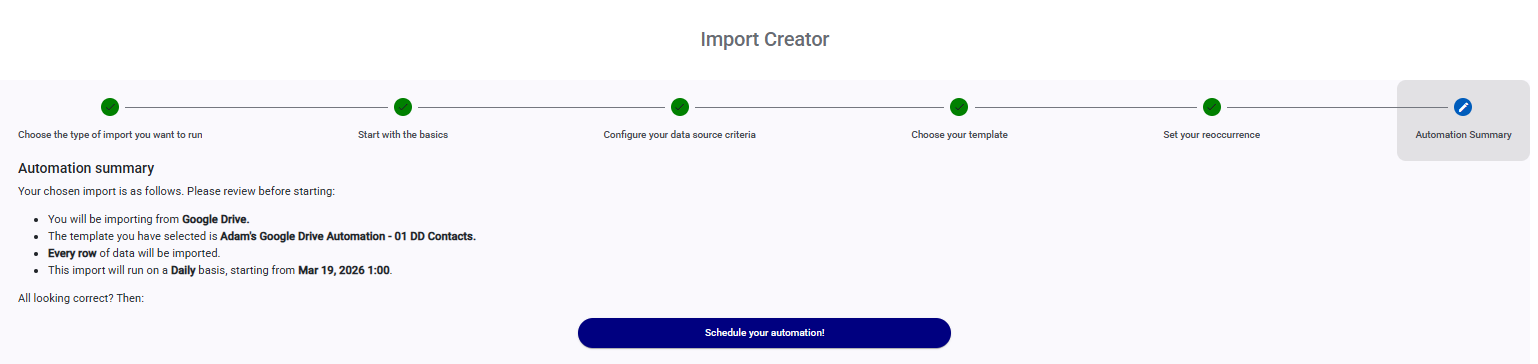
Automation Summary
Finally, review your Automation import and click on ‘Schedule your automation!’ to activate it.