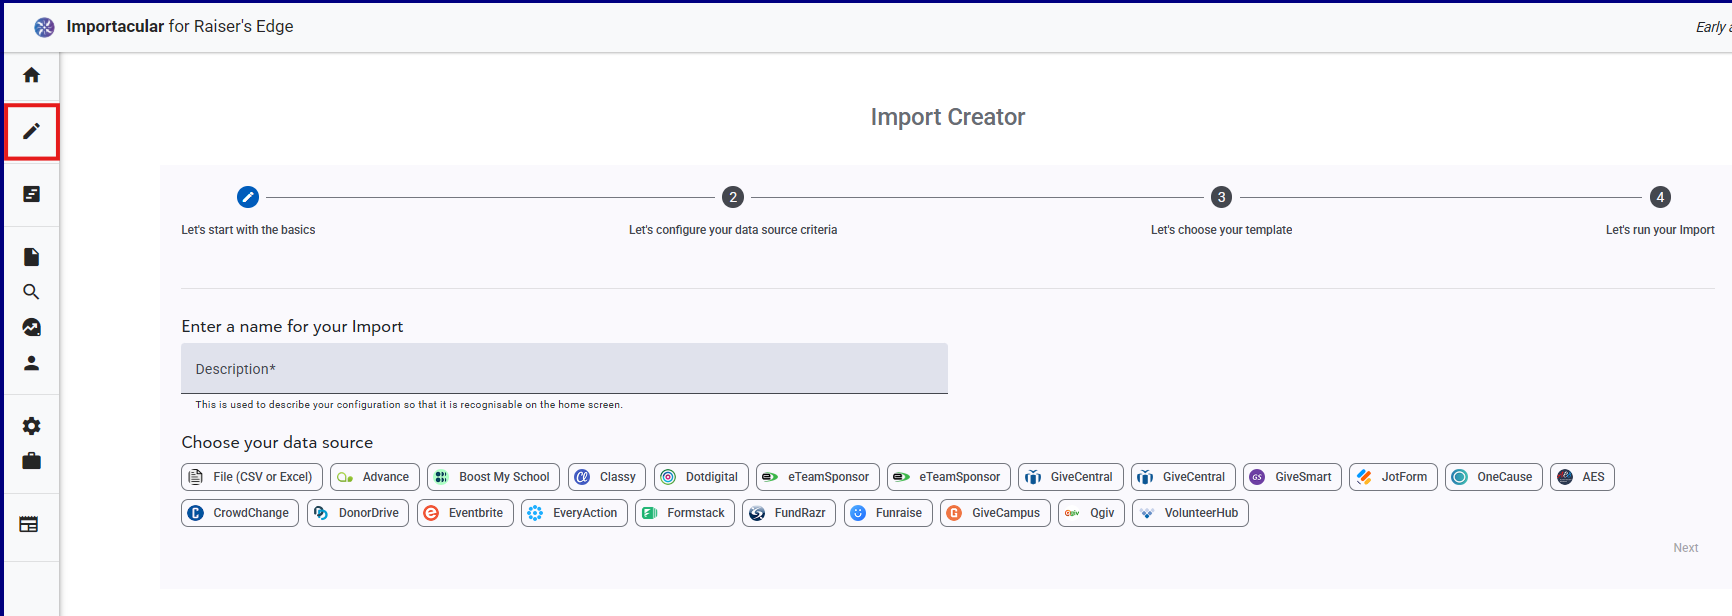
The Import Creator can be found by clicking on the pencil icon on the left-hand menu or the New Import button on the Dashboard. From here, give the import a name. The name will appear on the cards in the Dashboard, so try and apply a sensible naming convention. Next, choose the source for your data.
Other than File (CSV or Excel), all 3rd Party data sources will need to be authenticated via the ‘Manage your data sources’ section before they can be used. You will also need to have suitable templates (with associated Record Lookups) in place for the data source you are using.
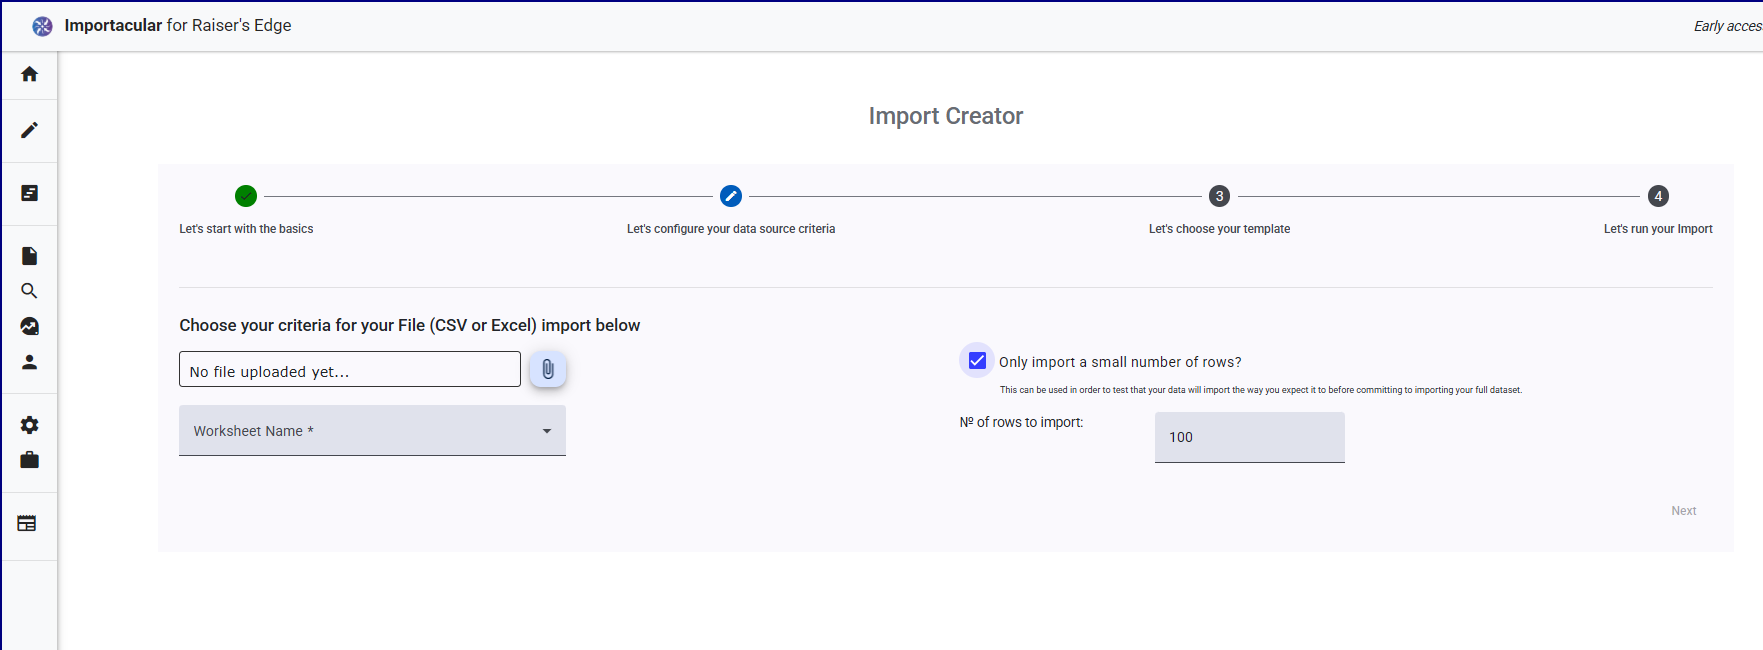
Configure your data source criteria
Select what data you want to import into RE NXT. Each Data Source is different, but should be self-explanatory if you are familiar with the data source in question. If the data source is file-based, attach the file by clicking on the paperclip icon and searching for the file on your computer. If the file is an Excel document, be sure to select the correct worksheet for Importacular to use.
You can also choose to limit the number of records to be imported from this screen
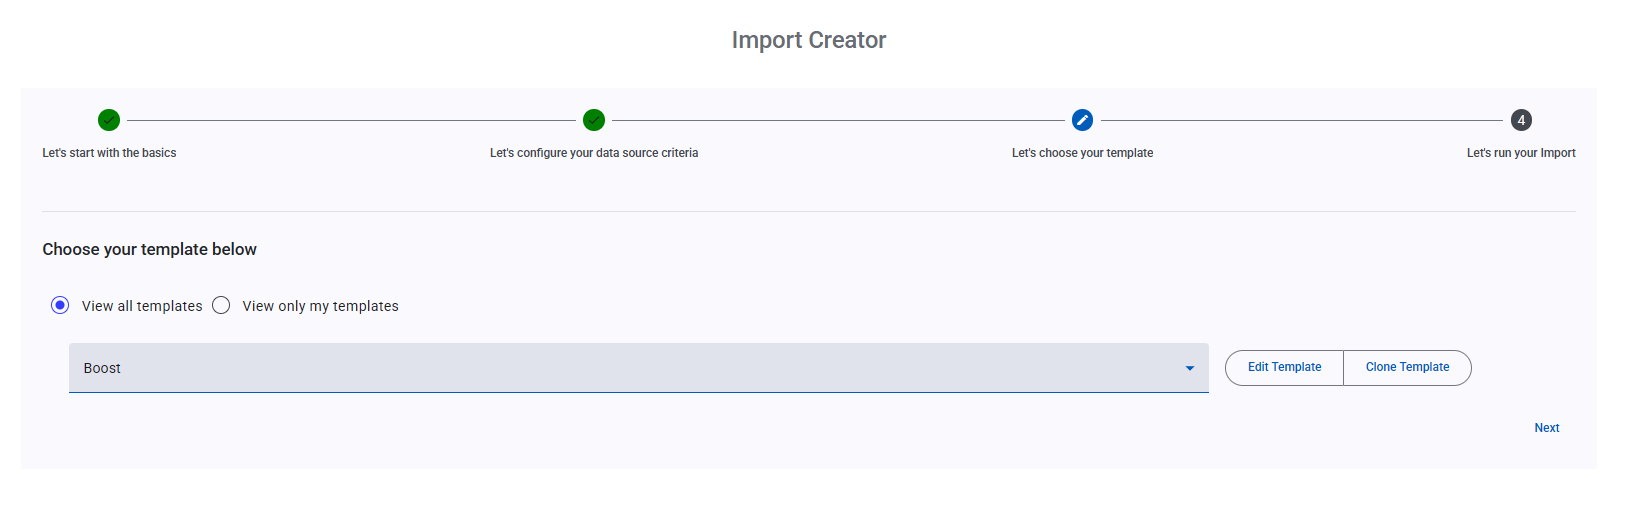
Choose your template
Select your pre-build template that is associated your data source. If you wish view or edit your template (or it’s associated Record Lookups), click on the ‘Edit Template’ button. If you want to tailor your template, specifically to the data attached, click on ‘Clone Template’ button and then make your adjustments as you see fit.
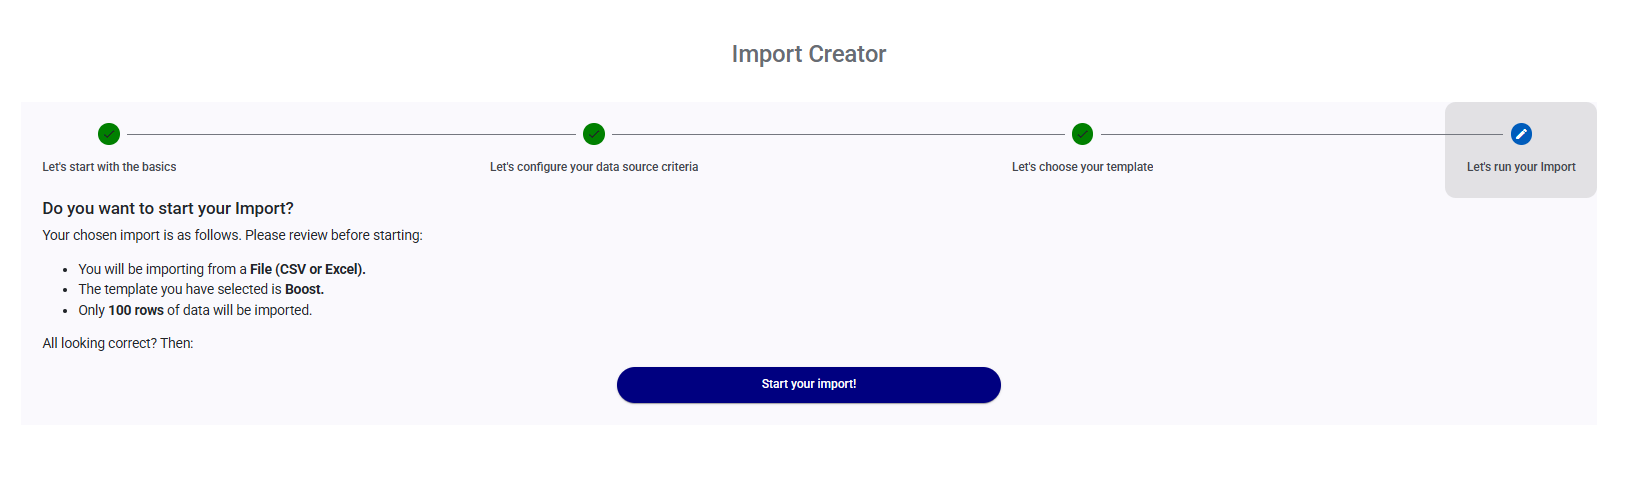
Run your import
When you are ready, review the import and then click on ‘Start your import’
Other ways to start your import
Via Template Manager
When you build or edit your template via the Template Manager, you are given an option to continue on to the Import Creator. In this scenario, the Import Name will be pre-populated with the Template name (we recommend you adjust this according to your naming convention). The data used to build your template will also be pre-populated along with the template itself.
Via Review Stage
Once you run your Import, a card will be generated providing you with an update of what is happening. After it has completed this first set of processes, the Card will appear in the ‘Imports Requiring Attention’ row, where you are invited to review that data and matches. If you wish to revise your Import, click on the ‘revise and rerun’ amber button. This will delete the import and return your to the Import Creator, pre-populated with all the relevant fields.
Via Completed Stage
Once you have reviewed and continued your import, the finished card will be placed in the ‘Recently Completed Imports’ row on the dashboard. If there are any exceptions or ignored records in the import, you can click on the ‘view results’ button. If you select the Exceptions or Ignored records, you can then select the ‘re-import data’ button where you will be taken to the Import Creator, again pre-populated with all the relevant fields, and limited to just the records you have selected from the results pages.