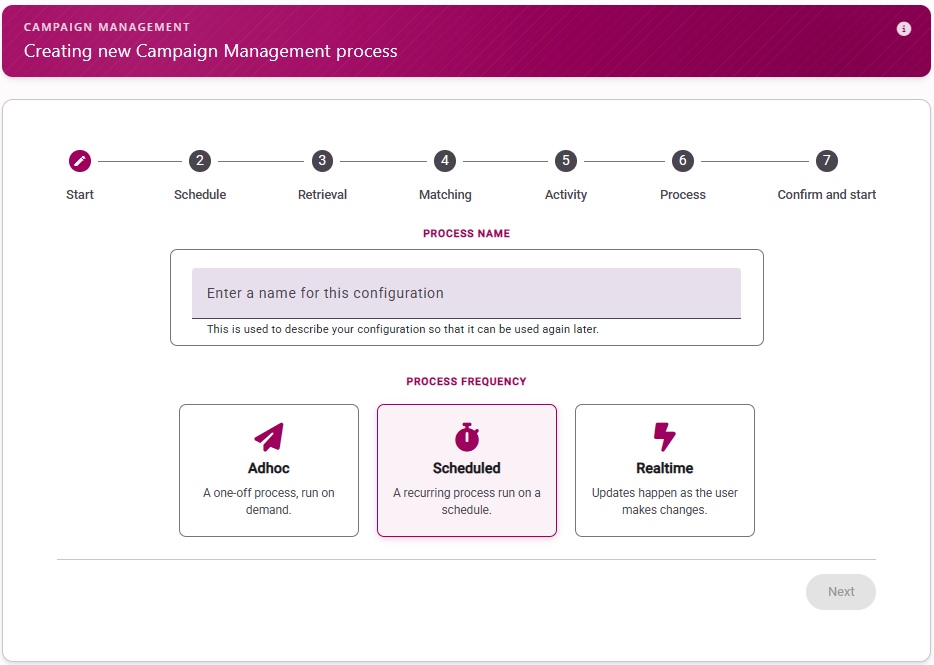
Give your process a name and choose ‘Scheduled – a recurring process’
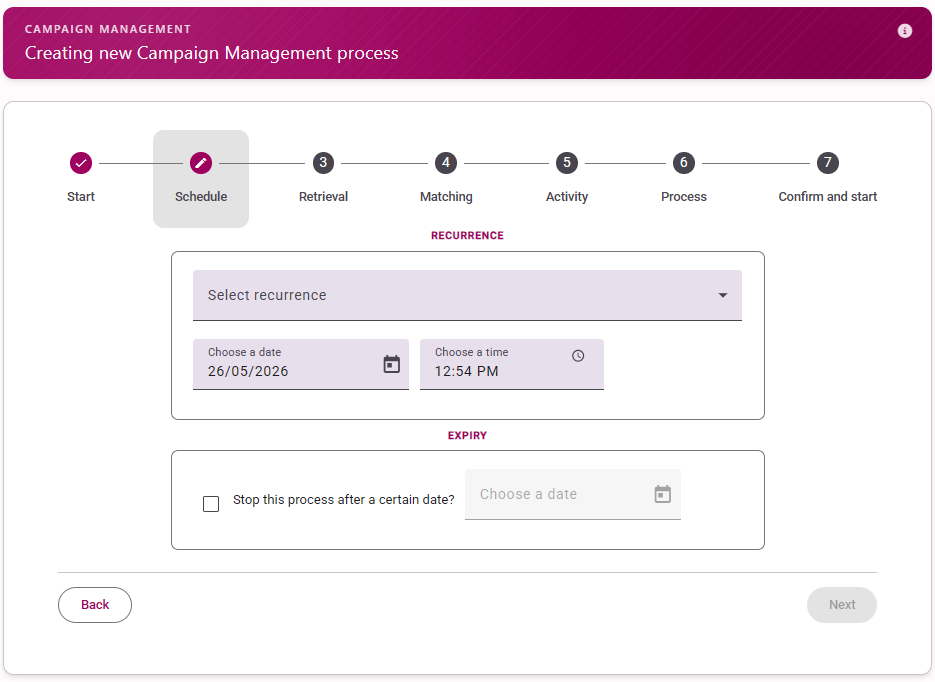
Schedule
Select how often the process should be run and when it should start. You can choose from daily, weekly or monthly options. You can now also apply an end date to the process so that you don’t have to lots of scheduled processes running with nothing to process
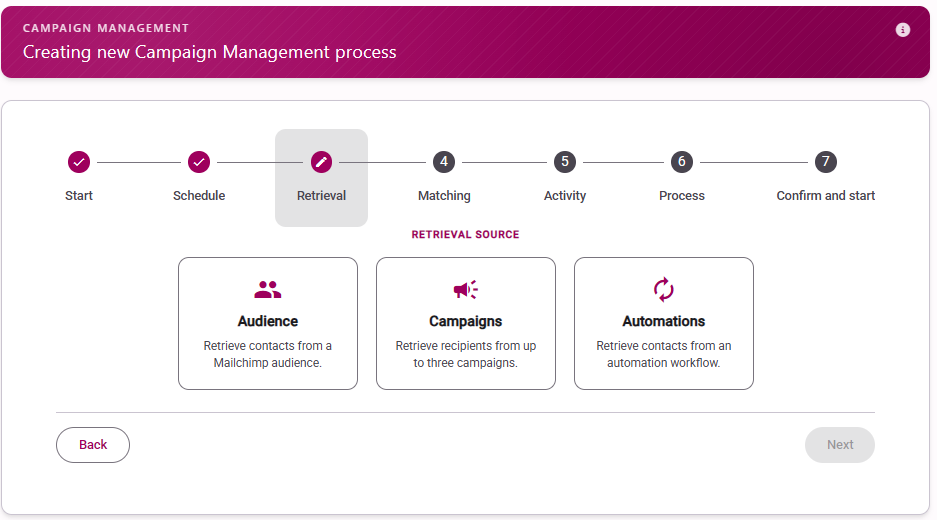
Data Retrieval
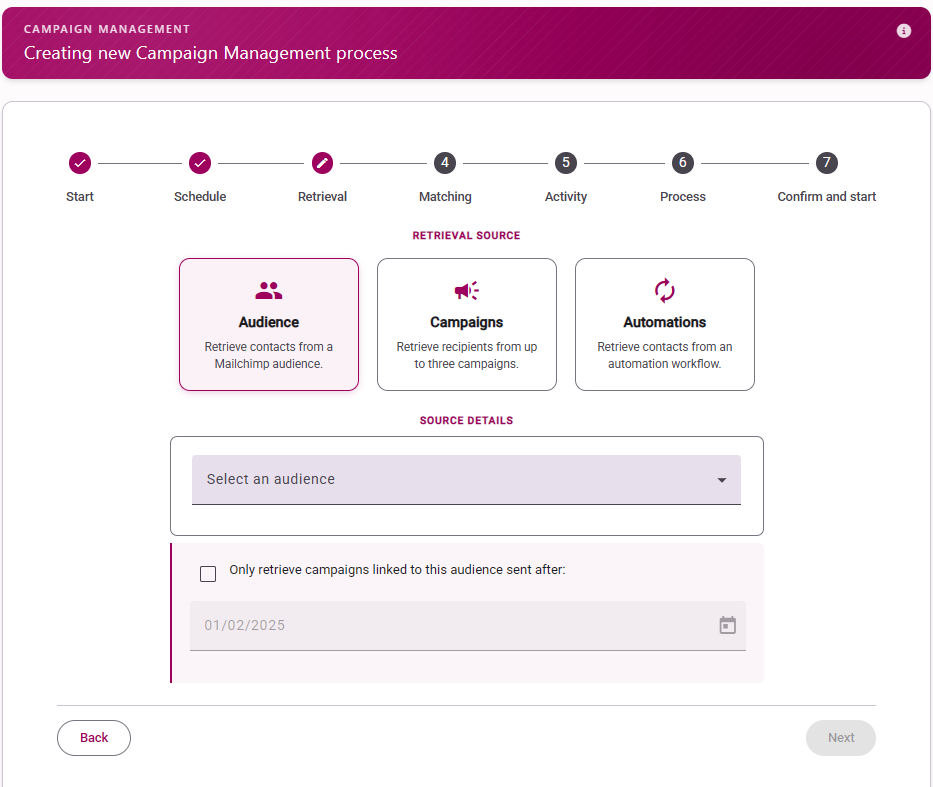
Select where to pull data from, either:
- An Audience; your Mailchimp audiences will populate the dropdown, select which to process. When selected, an additional option will appear that allows you to set a date to only retrieve campaigns linked to the Audience that were sent after that date.
- A Campaign; your Mailchimp campaigns will populate the dropdown, select which campaign(s) to process – you can select one, two or three campaigns from the same audience
- An Automation Workflow; your Mailchimp automation workflows will populate the dropdown, select which one to process, you can then also select one or more emails from those in your automation on the secondary dropdown
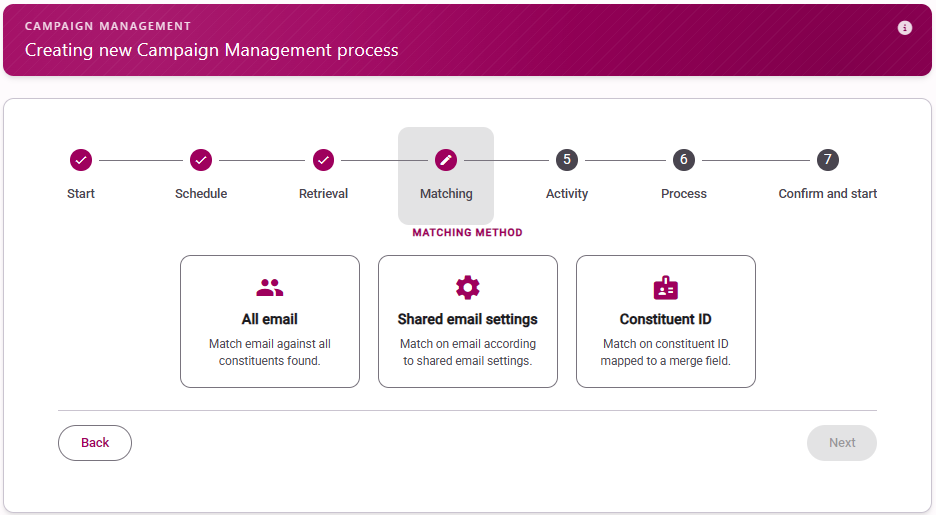
Matching
Choose how records should be matched:
- ‘Match against all constituents found’; so if this email is shared by two or more constituents in RE this action will be performed on each record containing this email address
- Match on email according to duplicate email settings; if you have defined a ‘main contact’ for an email address in the configuration this record will be used for this process
- ‘Match on constituent id mapped to the following merge field’; select the Mailchimp field from the drop-down containing your ConsID, this is obviously the most accurate way of matching records
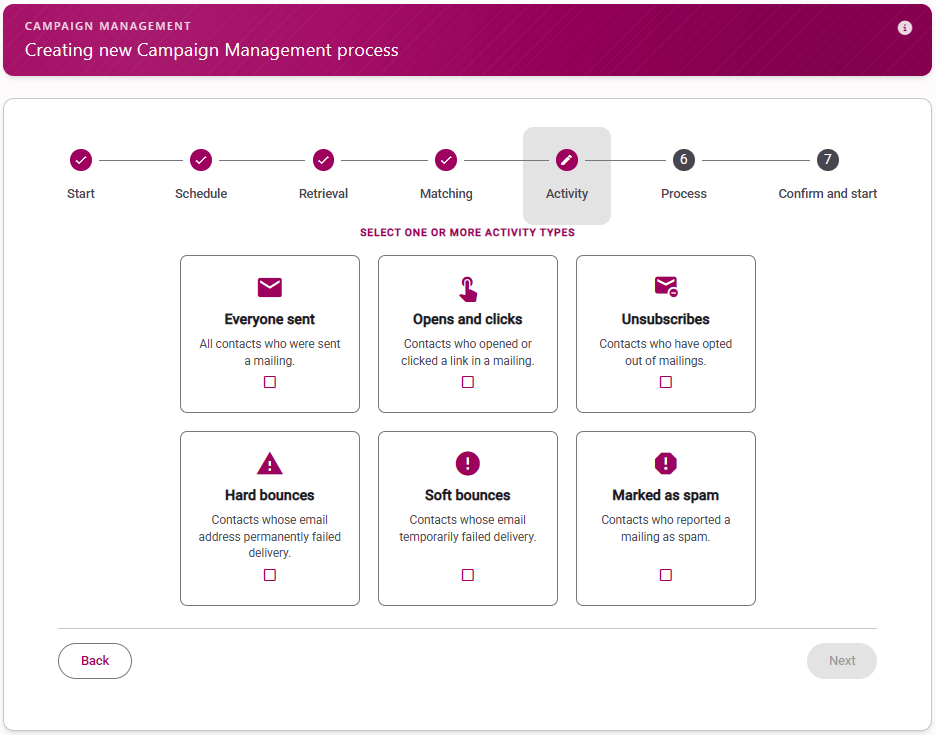
Activity
Select what data you want to retrieve from Mailchimp, you can choose one or more of the following:
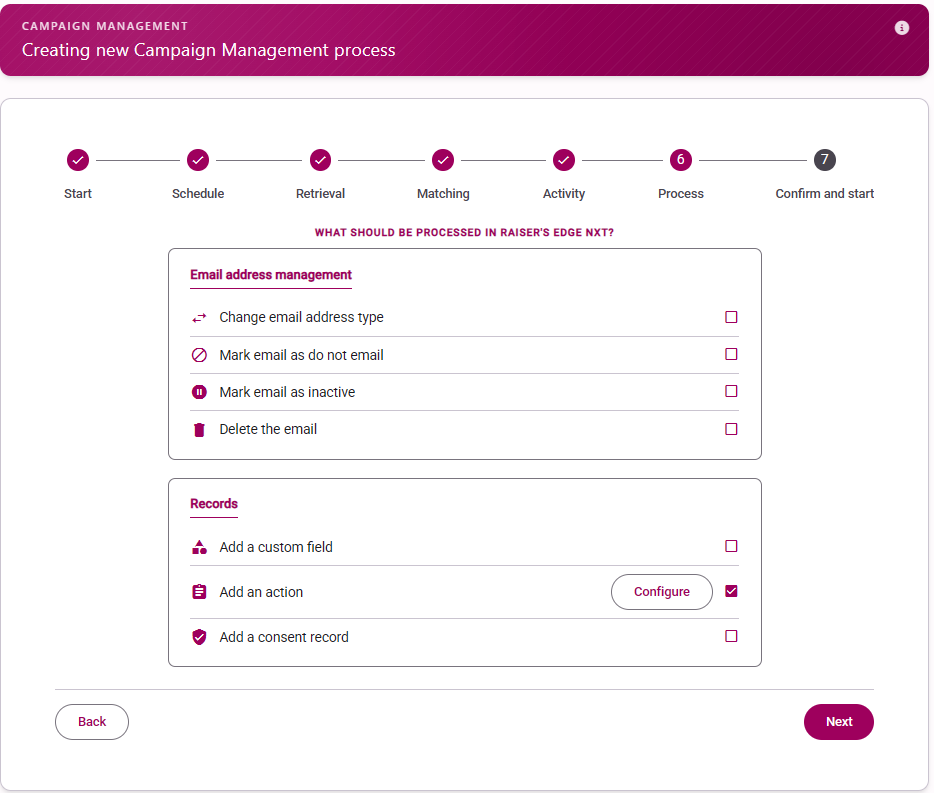
Process
How should this data be processed in your CRM? Select one or more of the below options:
Adding an Action
When adding an Action, most fields are self-explanatory as they replicate the fields that are available in RE NXT. However, it is worth highlighting that Action Summary can be populated as a Simple Text field or by using the Campaign Name you used in Mailchimp.
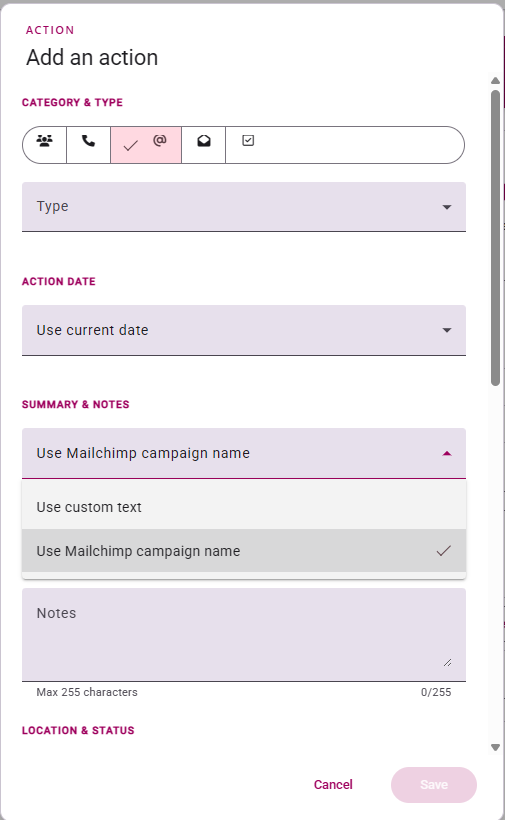
Using the Mailchimp Campaign Name in your Action Summary will make it easier to set up a Campaign Management process for multiple Campaigns at the same time.
Confirm and Start
Review your template and click on ‘Schedule your process’. Your Scheduled Campaign Management process will be queued and appear on the Upcoming Scheduled Processes section on the Overview screen. Please note there may be a short delay before the Card appears on the Overview screen due to Mailchimp processing procedures.
Please note: “Add a consent record” is only available on compatible databases
A Note on a Schedule Process that processes Audience data
The first time a Scheduled process runs, it will process all relevant data. Every repeat scheduled run of the process will only process the relevant data from the time before. If it is a daily schedule, a report run of the process will only process the data from the previous 24 hours.
If you have years of campaign data within your Audience, you might not want your Scheduled Process to process all this campaign data on t’s first pass. You might just want to process the last few months of Campaign data. If this is the case, there is an option to select a date of how far back you want to go: