
To help you better understand what your template is going to do with your incoming data, we have three modes in the Review Data screen to consider: Simple Mode, Advanced Mode and Relationship Tree. Simple Mode is design for a very quick overview and simpler templates.
Advanced Mode
The Advanced Mode is designed to allow you to drill down into the incoming data and view it across multiple records. This will likely be the first time you will have seen the incoming data, and we present it here, not in it’s raw form, but after Field Manipulations, Field Update Conditions and Area Settings have come into effect. This way you to get to see that data, as it should arrive in RE when the import has completed.
Your incoming data may be very large and/or you have mapped them to a lot of fields. With this in mind, we don’t think a very long list of fields is useful/practical on screen so we provide you with ‘chips’ to select and build up the information that you want to look at in small, digestible chunks.
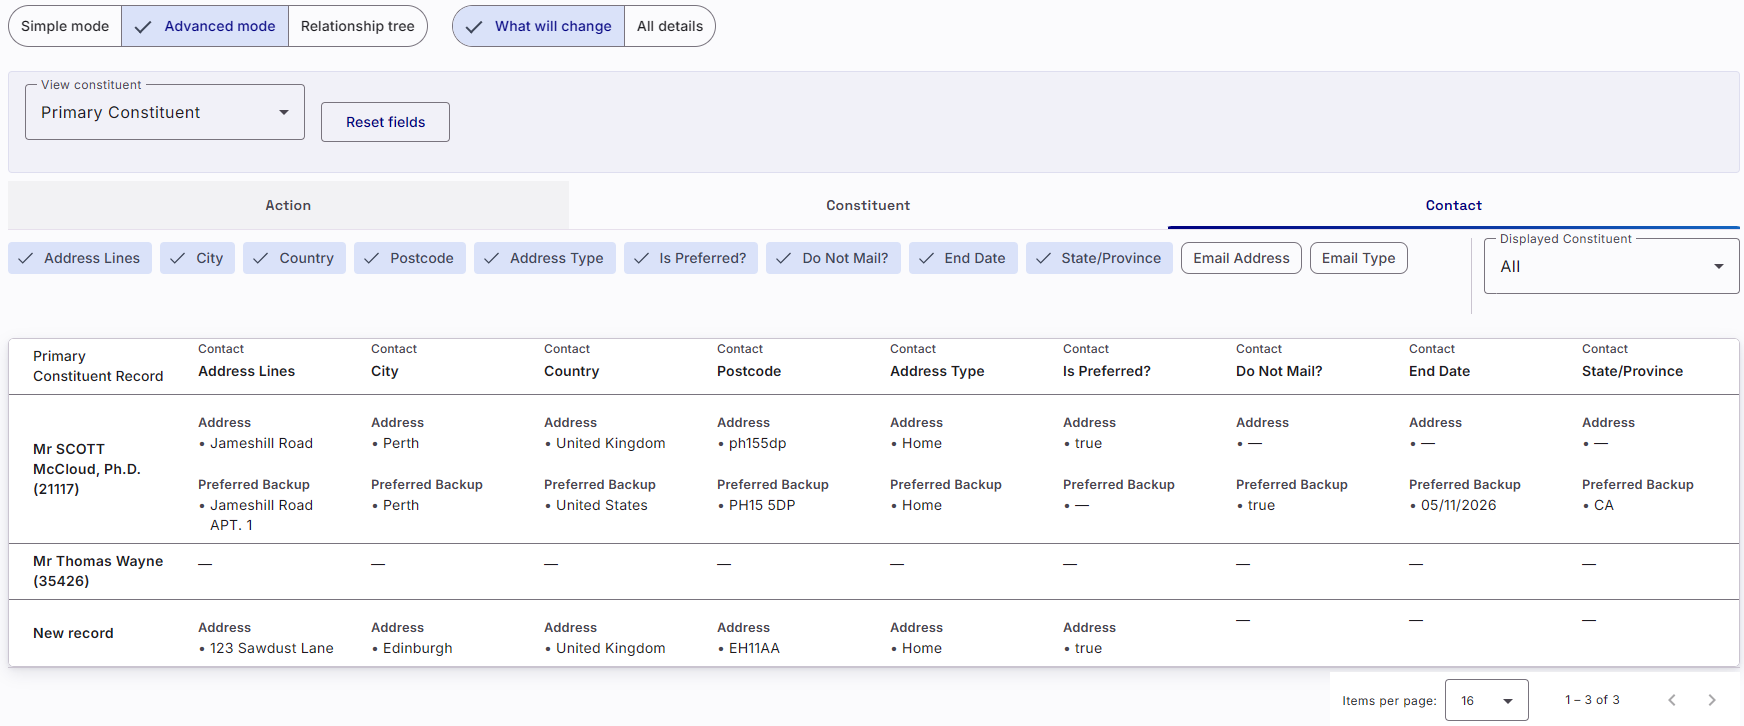
To help you better understand what is going to happen to the data, Advance Mode includes a filter to see ‘All Details’ or ‘What will change’.
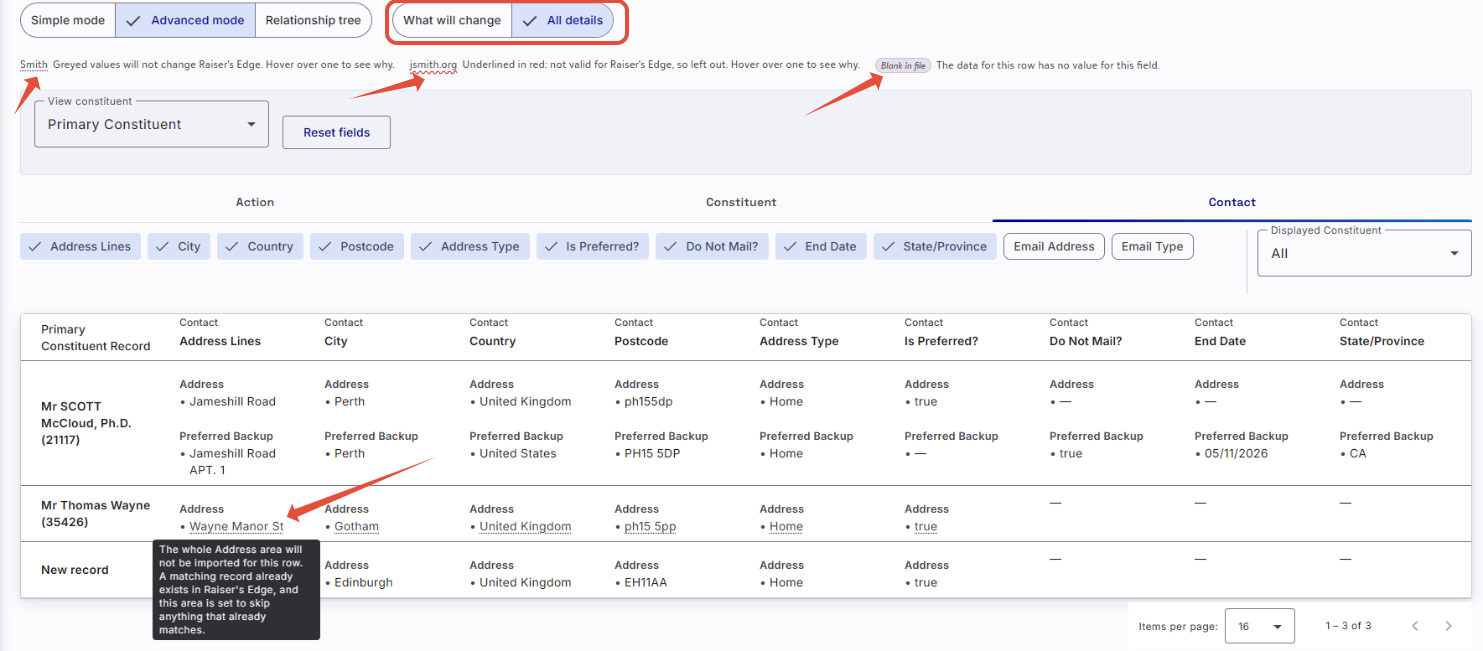
All Details
All Details lets you see more of the incoming data, highlighting issues (via a red squiggly line), blank values (via a ‘blank in file’ chip) and values that will not be imported (via a grey dotted line). Hovering over a field with a grey dotted line or a red squiggly line opens up a tool time that will give you more details as to the nature of the value:
What will change
What will changes will only show you fields that are due to be imported, leaving a dash in place where a field or area will not be added. This should help you see at a glance what is only going to be added.
Relationship Tree
The Relationship Tree allows you to see what data will be created, updated or skipped, per Row of your incoming data, using the Canvas Map you built within the Template Builder. This will include all ‘Linked’ mappings too.
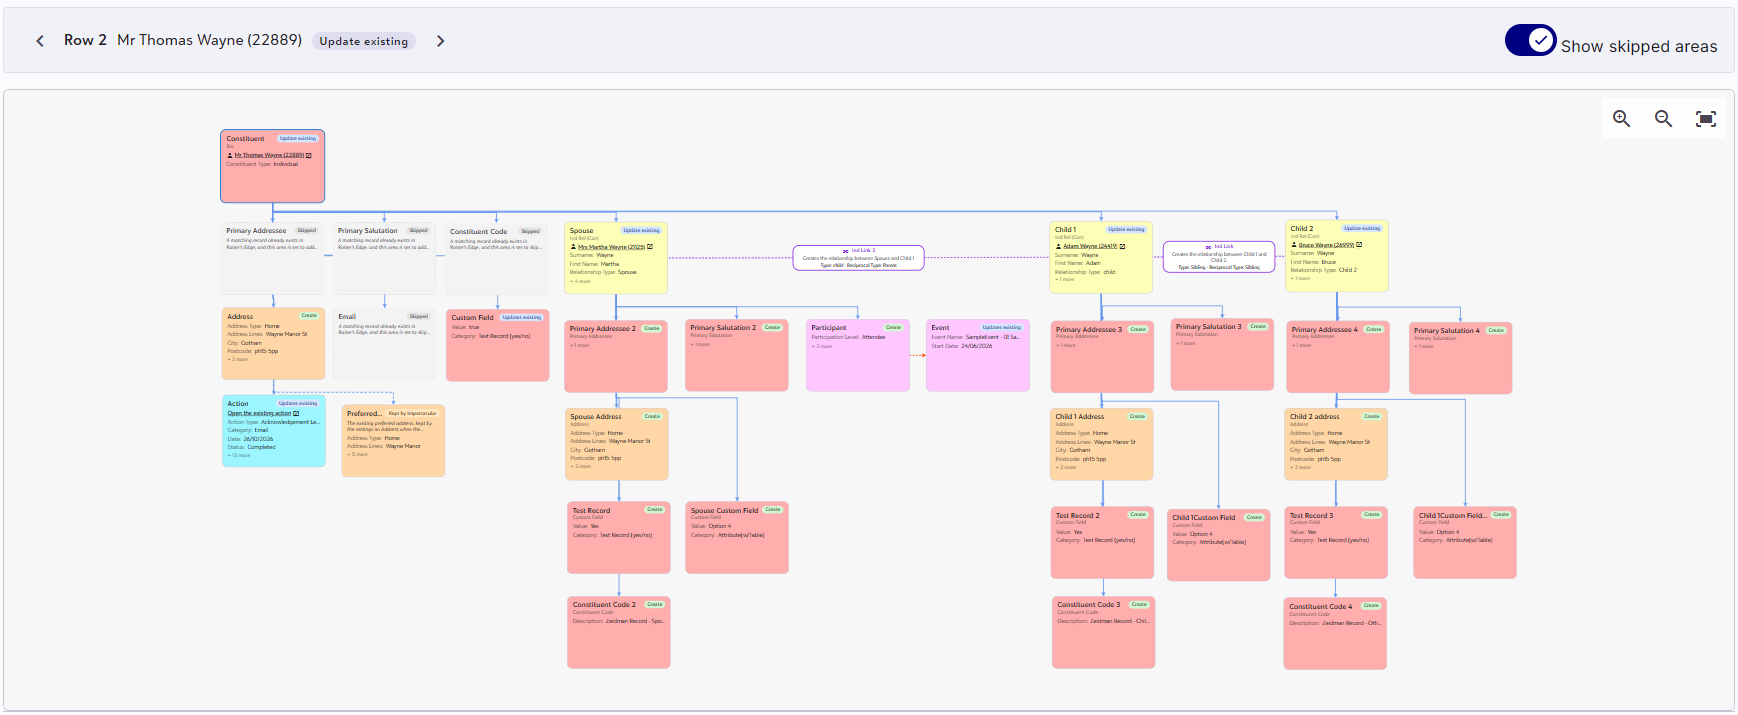
You can toggle which row of data to look at on the top left-hand side:
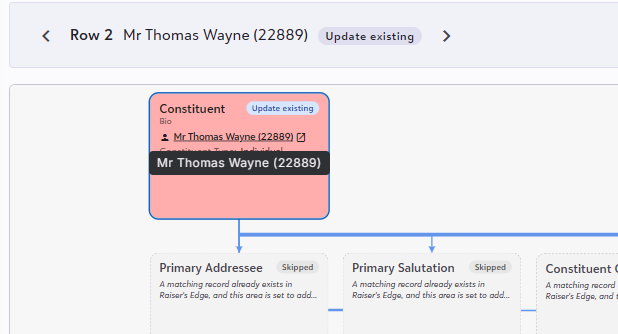
For Constituent records as well as Actions and Participants, you can also click on the underlined/hyperlinked section within a Mapping Area to open it up in RE NXT Webview
If you want more information about what incoming data is contained within a Mapping Area, just select it and a section will appear on the right-hand side. As well as more information, you also have the option to ‘ignore’ that area. This will only apply to the row you are looking at. If you find that you want to ‘ignore’ lots of Mapping Areas, this would suggest that your Template isn’t working as hard as it should and you should look to refine your template further.
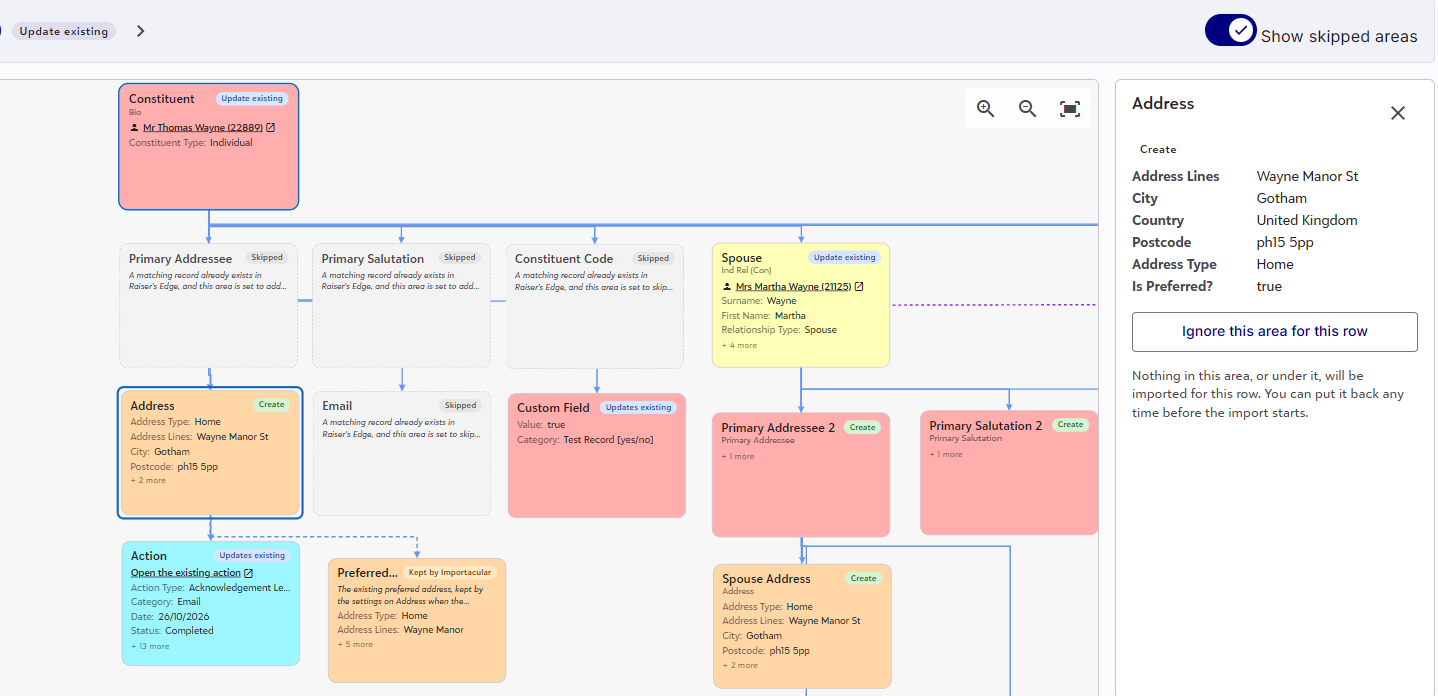
On the top right-hand side the screen there are canvas tools to help you zoom in, zoom out and Fit to page.
You can also hide ‘skipped’ Areas to help you see only what will be created or updated.