Activation
The first time you use Chimpegration you will need to authenticate it with Mailchimp before you can start using it.
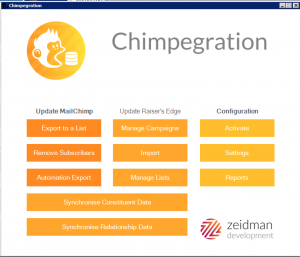
Firstly go to plug-ins and open Chimpegration. you will see the screen below (a different main menu is shown for versions under 4):
You need to first click on Activate. This will prompt you to enter your ZeidZone username and password. If you don’t already have an account you can create one here.
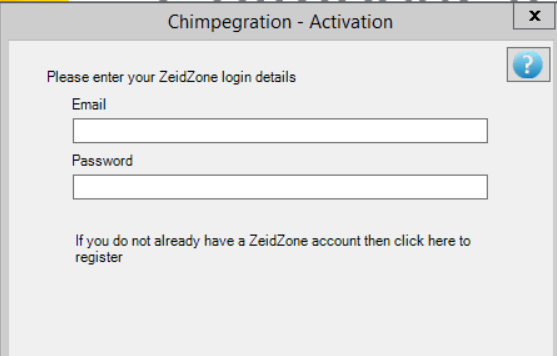
Activation will register your copy of Chimpegration with Zeidman Development. The process sends your organisation name and Raiser’s Edge serial number to our secure servers. This generates a registration code that is unique to your installation.
Settings
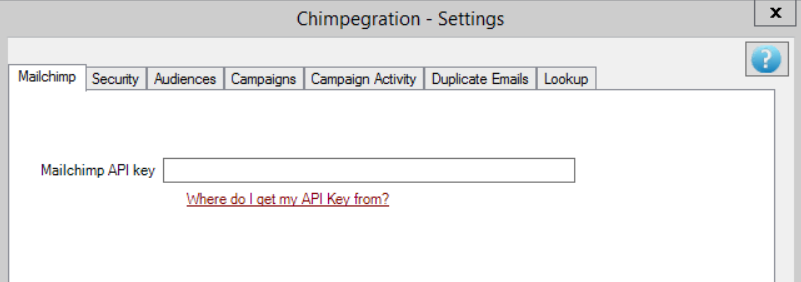
In order for Chimpegration to “talk” to Mailchimp it needs to know your API key.
Click on Settings and enter your Mailchimp API key if you already have one. NOTE: Your API key must be created by an ‘Administrator’ on Mailchimp, this gives Chimpegration access to all the areas it needs in your account.
To get a new API key click on “Where do I get my API Key from?” link as shown below, this will take you directly to your Mailchimp account settings where you can generate one (you will need to login to Mailchimp), copy your API key and paste it here. Click OK.
For self-hosted/on premise users: The first time that you process a campaign or synchronise with Mailchimp you may be prompted for the connection details that you created in the server setup as shown below:
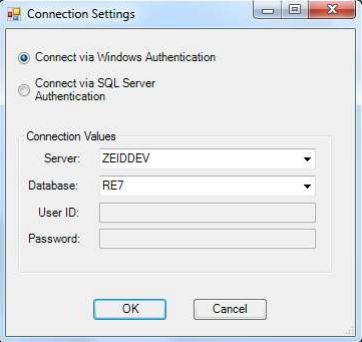
Enter the SQL server credentials that you set up on the server in order to continue.
Note that in order to use Chimpegration View these settings need to have been entered previously. You can also set these values by pressing the ZD logo on the main Chimpegration menu to bring up the About box. Under the advanced menu select “Setup SQL Credentials” to bring up the above screen.
You are now ready to start using Chimpegration.