In order to import a recurring gift or pledge payment, the original gift (with a gift type of Pledge or Recurring Gift) must already exist in RE, so you will need to run two imports when setting up a new recurring gift or pledge. The first import will create the record for either the Recurring Gift or Pledge and the second will add payment(s). You will need to add the schedule to the Recurring Gift or Pledge mapping.
To watch a video specific to schedules for recurring gifts, click here. To watch a video specific to pledges, use this link.
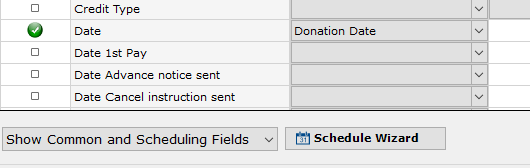
When mapping gifts, it is possible to restrict the fields shown. By default, Importacular only shows the most common fields. However if you are importing gifts that require a schedule e.g. pledges with instalments or recurring gifts, when selecting the “Show Common and Scheduling Fields” filter option the Schedule Wizard button appears as shown below.
We realise how difficult it is to import a schedule into RE using the built in import tool. It is not very intuitive when deciding which values should go into which columns. The schedule wizard assumes that all values are being defaulted. If, however the data source determines the schedule you will need to adjust the columns accordingly. You can watch a video that shows the difference between those two options here. For more information regarding the wizard, please watch this video.
The schedule wizard changes depending on the frequency. In this overview we will look at the two most commonly used schedules; monthly and annually.
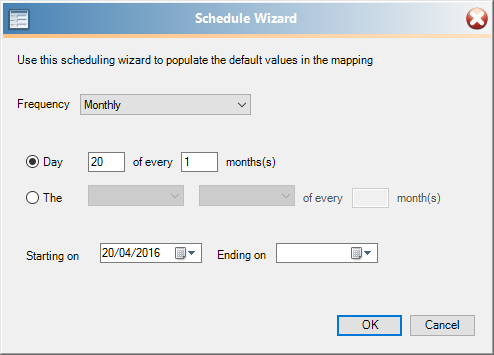
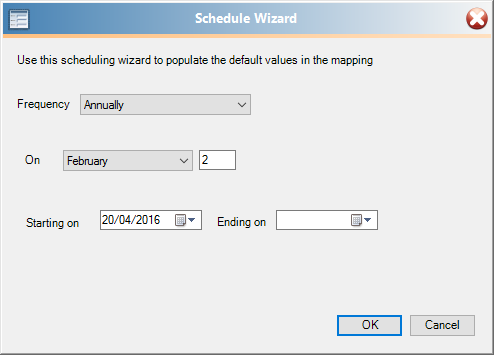
The wizard follows the same format as when you press the schedule button on the gift. The above schedule is for monthly. Below is for an annual schedule.
When pressing OK the mapping screen is populated with the default values. This is for the annual schedule


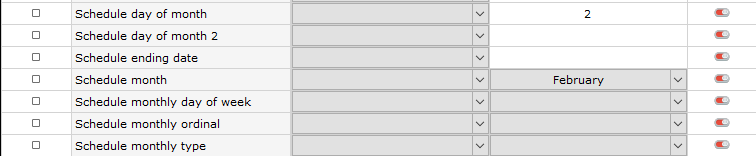
And for the monthly schedule:

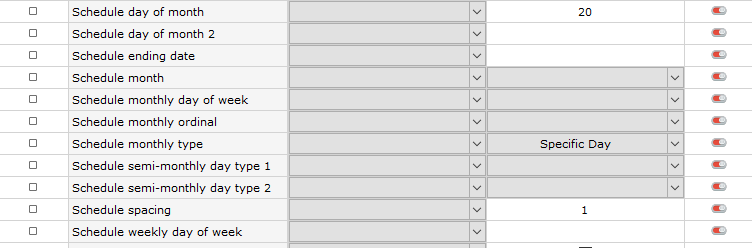
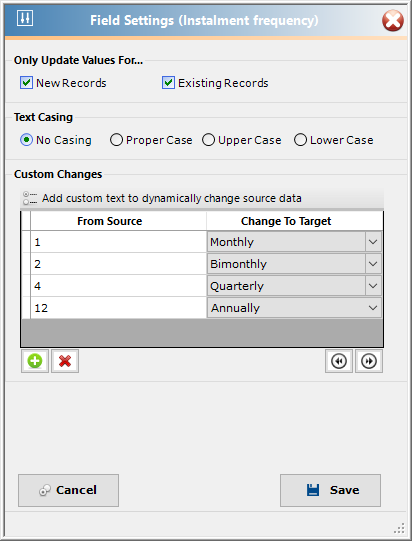
The wizard assumes that all the values will be defaulted. However if the data source provides values then you may need to transform them. For example if the data source supplies the number of months for the instalment frequency e.g. 1 for monthly or 12 for annually then you will need a transformation on the Instalment Frequency field as shown below:
To watch a video showing how to import two different frequencies with schedules, please watch this video.
Importing Monthly and Annual Schedules
If you wish to set-up your template to create Monthly and Annual Schedules, you will need to map the Source Field, rather than using the Default Values populated by the Schedule Wizard. The fields you should consider changing from Default Value to Source Field are ‘Date 1st Pay’, ‘Instalment Frequency’, ‘Schedule day of month’, and ‘Schedule Month’. Obviously, this requires that you have the necessary data in your Data Source to be able to populate these fields correctly. Either directly or something that can be transformed using Date transformation or Data Transformations. Some of which are covered above.
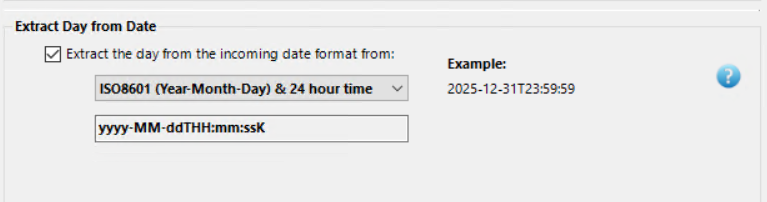
Schedule day of month
Map a suitable Date to this Source Field. If the incoming date is not is a format that RE will understand, you will need to tell Importacular with the incoming date format is. Head to the field setting for Schedule day of month and head to the section called. ‘Extract Day from Date’. Please check this option and tell Importacular what the incoming date format is. Importacular will know how to extract the correct day of month to use.
Schedule Month
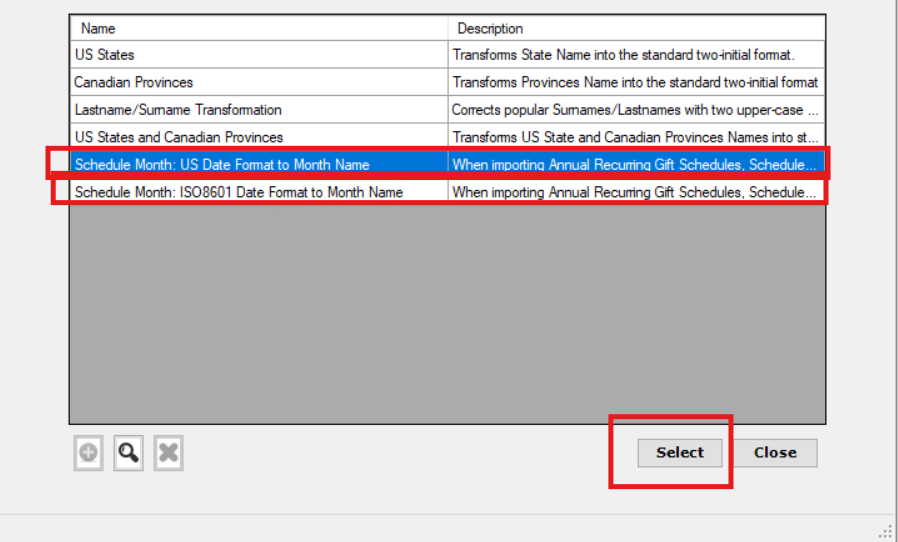
This field requires the incoming data to be text version of a month e.g. January, February, etc. If your data source does not contain this value, you can apply a suitable date field to the Source Field and apply a Data Transformation that will transform the numerical ‘Month’ value from your date into the relevant text version. For your convenience, we have created two Global Transformations that can be added to the Field Settings. Use the Global Transformation based on the date format you have mapped (US Date Format (MM/dd/yyyy …) or ISO8601 (yyyy-MM-dd…)) and press ‘Select’.