Once you have selected your data source, you will be able to select a saved template or create a new one. When you open Importacular for the first time (or when you open a specific data source for the first time), you will not see any templates in the drop down menu. Templates are data source specific.
When using an existing template, ensure that the fields are consistent with the options available when you created the template. Changes to field names can result in loss of field mappings in your template. We recommend, prior to every import, review your template to ensure that it is still going to do what you expect it to do. To do this , click on the ‘pencil’ icon. This will open up the Template Editor.
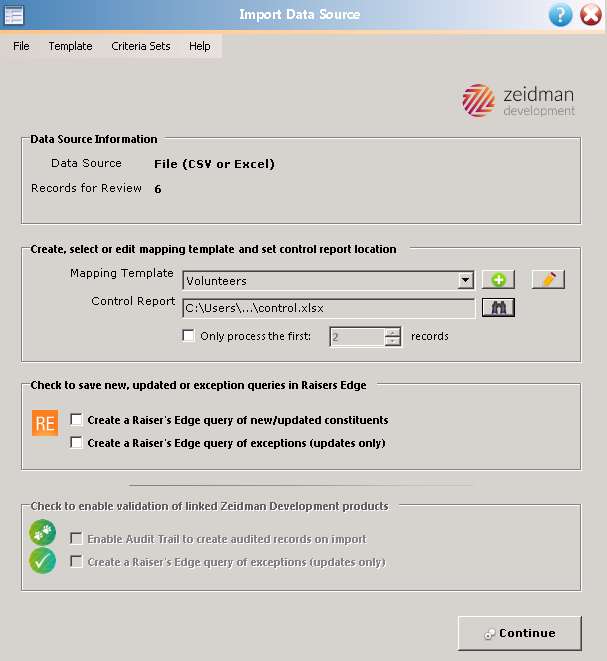
To create a new template, click on the green circle with the plus symbol and choose a name for your mapping template. You can have many different templates for different events, forms, email lists etc. If you are not sure what is contained within your data source, please consider using the ‘Export and Anonymise Data tool’ to generate a separate Excel for you to review what data is held within each data source field

As previously mentioned, to edit or view an existing template, select the template that you would like and then click on the pencil icon to the far right. This will open up the Template Editor window. To maintain template integrity, do not open a template with a data source that contains different field names than the one that you created the template with (i.e. if you are working with an Excel sheet, you should ensure that you have the same column headers in your file that were in the file used to build the template). Any changes to field names will require you to review your template to ensure correct mappings are in place. See this knowledgebase article for more information.

Once you have started a new template or opened an existing one, you can now map data to different areas of RE using the tabs provided. See the import areas for more details.
Control Report
Once you have selected/created your template, you will need to assign a Control Report. Click on the Binoculars icon and select a suitable location for where the Control Report will be created, when you Validate or Import. Once you have a suitable locations, in the ‘File Name’ section, type in a suitable name for your Control Report. We recommend a sensible naming convention that tells you what it is and when it was generated. For Example ‘Control Report [DATE]’.
If you are running multiple Imports in the same day, then the Control Report name should reflect the name of the import process as well. For Example, ‘Control Report [DATE] – Volunteers’.
We also recommend keeping hold of these Control Reports as that act as a suitable Audit Trail as well as providing useful information about any Exceptions you may need to look at.